How to Determine When Sanding Is Complete for Floating Wood Shelves
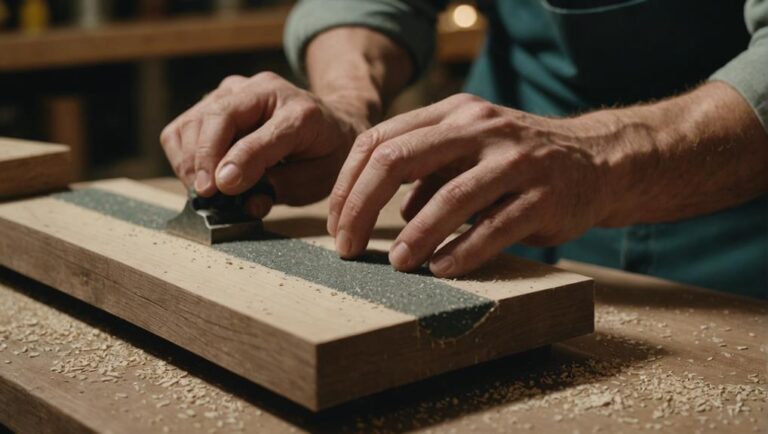
To determine when sanding is complete for floating wood shelves, begin with 120 grit sandpaper, progress to 150, and finish with 220 for a smooth finish. Examine the surface in both natural and artificial light to reveal any imperfections or uneven areas. Ensure the wood is uniformly smooth, checking for rough patches or subtle inconsistencies. A damp cloth can help identify spots needing more attention. Once the surface feels consistently smooth without visible scratches, the sanding is complete.
Now, let's delve into achieving a professional finish for your floating wood shelves.
Key Takeaways
- Run your hands over the wood to ensure a smooth, flawless texture without any bumps or rough patches.
- Examine the surface under various lighting conditions to detect and address any lingering imperfections that may affect the final look.
- Use a damp cloth to wipe the wood and reveal any uneven areas that require further sanding for a uniform finish.
- Check for any visible scratches or inconsistencies in the wood under bright light to ensure a pristine appearance.
- Verify that the wood grain is consistent and the color tone is even across the entire surface of the floating wood shelf.
Understanding Wood Sanding
Understanding the sanding process for floating wood shelves is crucial for achieving a flawless and professional finish. The choice of sandpaper grit plays a significant role in this task. Starting with a coarse grit, such as 120, helps to eliminate rough spots and imperfections on the wood surface. Progressing to finer grits ensures a smoother and more refined finish. It's important to note that different wood species react uniquely to sanding, so it's essential to consider the specific characteristics of the wood being used.
During the sanding process, proper lighting is key to inspecting the work effectively. This helps in identifying any remaining scratches or rough areas that may require additional attention. Running your hand over the sanded surface allows for a tactile check to ensure it feels smooth to the touch.
Successful sanding is achieved when all visible imperfections are removed, preparing the wood for staining, finishing, or painting.
Tools and Materials Needed
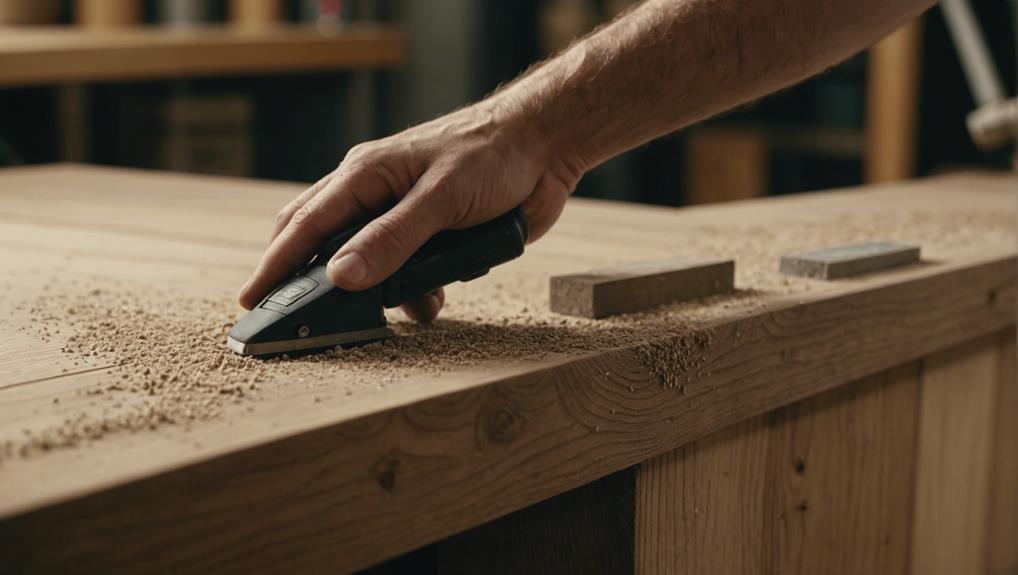
For optimal results in sanding floating wood shelves, gather the necessary tools and materials. Start with a reliable sanding block or a sanding machine for efficiency. These tools will help achieve a smooth, professional finish on the shelves.
Begin sanding with coarse grit sandpaper, like 60 or 80, to eliminate major imperfections. Progress to finer grits, such as 120 and 220, to refine the surface. Having a range of sandpaper grits on hand is essential for a seamless transition from rough to smooth.
In addition to sandpaper and sanding tools, a high-quality wood conditioner is crucial. This product ensures that the shelves absorb stain evenly, enhancing the natural beauty of the wood grain and preventing uneven coloring.
A well-lit workspace is important for closely inspecting the shelves to detect any rough spots or inconsistencies by both touch and sight. Keep the workspace clean and free of dust to avoid contaminating the wood surface. Gathering these tools and materials sets the stage for flawlessly sanding floating shelves.
Choosing the Right Sandpaper
When choosing sandpaper for our floating wood shelves, it's crucial to grasp the varying grit levels and types at our disposal. We should commence with 120 grit to address any rough spots, progress to 150 grit for a smoother surface, and conclude with 220 grit for a refined, uniform finish primed for staining. It's also beneficial to be acquainted with the different types of sandpaper available and utilize a sanding block to achieve a polished and flawless outcome.
Understanding the significance of grit levels in sandpaper selection is pivotal for preparing our floating wood shelves. Beginning with a coarser grit like 120 ensures effective removal of imperfections, while advancing to finer grits such as 150 and 220 contributes to a smoother texture and finish. By following this gradual progression, we can achieve a professional result that enhances the overall appearance of our shelves.
In addition to selecting the appropriate grit levels, being aware of the different types of sandpaper can further elevate the quality of our floating wood shelves. Varieties like aluminum oxide, garnet, and silicon carbide offer distinct benefits depending on the specific requirements of the project. Pairing the right type of sandpaper with a sanding block allows for greater control and precision, ultimately leading to a more refined and professional outcome.
Sandpaper Grit Levels
Choosing the right sandpaper grit levels plays a crucial role in achieving a polished and professional look for your floating wood shelves. We begin with 120 grit sandpaper to eliminate initial flaws and rough spots on the surface. This initial step sets the stage for a refined sanding process, allowing us to address any imperfections that could affect the final outcome.
After completing the initial sanding with 120 grit, we move on to 150 grit sandpaper. This stage further refines the wood, smoothing out its texture and preparing it for the final sanding phase. Using a hard block to support the sandpaper is beneficial in maintaining a flat surface, ensuring uniform results across the entire shelf.
The last step involves sanding with 220 grit sandpaper to achieve a fine, sleek finish, readying the wood for staining or finishing with oil-based options. We meticulously examine the wood surface post-220 grit sanding to ensure it's impeccably smooth and primed for the next finishing steps.
Sandpaper Types Explained
To ensure your floating wood shelves look impeccable, it's crucial to grasp the different sandpaper types available and their impact on your project. The choice of sandpaper types and grit levels plays a significant role in achieving the desired finish. Let's delve into the process:
Begin with a coarse grit, around 60 or 80, to eliminate any rough patches or flaws. This initial sanding stage lays the groundwork for a seamless surface.
Transition to a medium grit, approximately 120, to enhance the wood's texture. This step guarantees a smoother surface, preparing it for finer sanding.
Lastly, employ a fine grit, like 220, for a refined, professional appearance. This level of grit works wonders on end grain, preventing any blemishes and ensuring a consistent finish.
Using a sanding block is vital to maintain consistent pressure and to avoid irregular sanding marks. Throughout the sanding phases, closely examine the wood surface for any remaining scratches or imperfections.
This thorough approach guarantees that your floating wood shelves not only look stunning but also feel velvety smooth to the touch.
Starting With Coarse Grit
We kick off the sanding process with a gritty approach, starting with coarse sandpaper like 60 or 80 grit. This rougher grit is essential for addressing any blemishes and uneven surfaces on our floating wood shelves. By utilizing coarse grit, we efficiently tackle larger imperfections, laying a strong foundation for the subsequent sanding stages.
Maintaining consistent pressure and smooth movements across the entire surface is crucial during this initial sanding phase. This ensures an even and uniform finish, priming the wood for the staining and finishing steps ahead. Through careful attention to detail with the coarse grit, we can achieve a leveled and flawless surface, devoid of significant flaws.
Embracing innovation in our process involves recognizing the significance of this step, avoiding haste, and acknowledging its impact on the overall quality of our floating wood shelves. Our aim here isn't just to sand for the sake of it, but to strategically prepare the wood for the finer grits that will come next. Dedication to precision during the coarse grit stage sets the stage for a polished, professional finish at the end.
Progressing to Finer Grit
Once we've established a sturdy base with coarse grit sandpaper, we progress to finer grit options like 150 or 220 for our floating wood shelves. This transition is crucial in achieving a smooth surface and eliminating any scratches left behind by the coarser grits. By using fine grit sandpaper, we can ensure a more polished finish that exudes a professional look.
As we move forward, it's important to focus on a few key aspects:
- Uniformity: Sanding with 220 grit allows us to create a more consistent and uniform surface, which is vital for the final appearance of the shelves.
- Detail: The finer grit sandpaper enables us to pay attention to smaller details, enhancing the overall quality of the wood.
- Preparation: A smoother surface sets the stage for staining or finishing, as it enables the wood to absorb treatments more evenly.
Feeling for Smoothness
Determining the readiness of the wood for the next step involves relying on our sense of touch. By running our hand over the sanded surface, we can detect any rough spots or imperfections that may have been overlooked. The wood's smoothness must be uniform throughout the entire area.
Be attentive to any sections that feel rougher or less even compared to the rest. These variations signal the need for additional sanding.
The ultimate aim is to ensure the absence of visible scratches or rough patches when gliding our hand over the sanded wood. Once the wood feels silky and devoid of noticeable bumps or rough textures, we can confidently affirm the completion of the sanding process.
Checking for Uniform Color
To ensure that our sanding job on the floating wood shelf is thorough, we must inspect the entire surface for uniform color. The consistent visibility of the wood grain and an even tone across the shelf indicates that we've sanded it evenly and meticulously.
Let's take a damp cloth and wipe the surface to reveal any areas that may still require our attention.
Consistent Wood Grain Visibility
We must carefully examine the wood surface under different lighting conditions to ensure that the wood grain is consistently visible and the color is uniform. Consistent wood grain visibility is crucial for achieving a smooth sanding finish, which is essential for the overall appearance of the floating wood shelves. By inspecting the surface from various angles and light sources, we can easily detect any inconsistencies or areas that may need additional sanding.
To get a clear picture, follow these steps:
- Natural Light: Check the wood in natural daylight to identify any areas where the grain may not be as visible.
- Artificial Light: Utilize warm and cool artificial lighting to reveal any color or texture variations.
- Hand Inspection: Run your hand over the surface to feel for any rough spots; a smooth, even texture indicates proper sanding.
Even Surface Tone
Achieving a flawless and professional finish on our floating wood shelves hinges on maintaining an even surface tone. When sanding the wood, it's vital to ensure a consistent color tone throughout the entire surface. This uniformity serves as a clear indicator that the sanding process has been executed evenly, preparing the wood for staining.
It's crucial to meticulously inspect the wood for any signs of lighter or darker spots that could hint at uneven sanding. These subtle color variations are key details that need early detection.
When these inconsistencies are identified, it signals the need for further smoothing to seamlessly blend those areas with the rest of the surface.
Inspecting Under Different Lights
Examining your floating wood shelves under different lighting conditions ensures that every flaw and uneven surface is detected before the finishing touches are applied. By closely inspecting the raw wood under varying lights, we can guarantee that the final product is impeccable and ready for showcasing.
To begin, observing the shelves under natural light exposes any imperfections or uneven sanding that may be hidden under artificial lighting. Natural light provides a true representation of the wood's surface, making it easier to spot any irregularities.
Next, utilizing a bright LED light helps to pinpoint any scratches or rough patches that require additional attention. LEDs offer a focused beam of light that can illuminate even the smallest imperfections, leaving no rough area unnoticed.
Lastly, checking the shelves under fluorescent and incandescent lighting ensures a consistent smoothness across the entire surface. Fluorescent lights emit a wide, even light that can reveal subtle inconsistencies, while incandescent lights highlight any missed spots or areas that need further sanding.
- Natural Light: Reveals hidden imperfections.
- LED Light: Spotlights tiny scratches and rough patches.
- Fluorescent and Incandescent Lights: Confirms uniform smoothness and exposes any overlooked areas.
Addressing Imperfections
Upon thorough examination of your floating wood shelves in various lighting conditions, let's address any imperfections that may have been revealed. Begin by running your hands over the wood surface to detect any rough patches or inconsistencies that might not be visible to the naked eye. These tactile clues are essential in pinpointing areas that may require additional sanding.
Using a tack cloth is crucial to eliminate sanding dust, which could obscure any hidden imperfections. This simple step ensures that you are working with a clean surface, making it easier to identify any remaining flaws. Additionally, check for uniformity in the wood grain appearance. Inconsistent stain absorption can indicate the need for further sanding to achieve a uniform finish.
Here is a helpful table to keep you organized:
| Step | Action | Purpose |
|---|---|---|
| 1 | Inspect under bright light | Identify visual imperfections |
| 2 | Run hand over surface | Detect rough patches |
| 3 | Use tack cloth | Reveal hidden imperfections |
| 4 | Check wood grain uniformity | Ensure consistent stain absorption |
Final Touches and Cleanup
Before moving on to the finishing stage, let's ensure our floating wood shelves are perfectly smooth and free of any debris. Having a flawless wood surface is crucial for achieving a professional finish. To confirm that we've achieved this, follow these steps:
- Check the surface by running your hand over it: This step helps detect any rough spots or imperfections that may require further sanding.
- Use a bright light or flashlight to inspect the surface: By shining a light on the wood, we can easily spot any scratches or marks that need attention.
- Thoroughly clean the surface: Removing all dust and debris is essential to prevent any imperfections in the final finish.
By paying attention to these details, we elevate the quality of our craftsmanship. After identifying any areas needing additional sanding, let's focus on achieving a consistently smooth surface. It's crucial to be meticulous in this step, as even minor imperfections can impact the overall appearance of our floating wood shelves.
Once we're confident that the wood surface is flawless, we can proceed to cleaning. A clean surface ensures that our finishing products will adhere properly, resulting in a durable and visually appealing finish.
During this final stage, our dedication to detail transforms good work into outstanding craftsmanship, embodying the innovative approach we strive for in every project.
Frequently Asked Questions
How Do You Know When You Are Finished Sanding?
It's easy to tell when the sanding process for floating wood shelves is complete – the surface will be smooth and uniform. By visually inspecting the shelves under good lighting, you can check for any lingering scratches or rough patches, ensuring a flawless, polished finish.
When sanding the wood shelves, it's crucial to aim for a consistent and even surface. This not only enhances the aesthetic appeal but also ensures the shelves are ready for painting or staining. By paying attention to detail and using the right sanding techniques, you can achieve a professional-looking result that will elevate the overall look of your space.
How Do You Know When Wood Is Sanded Enough?
It's an interesting observation that we can determine when we have finished sanding a floating wood shelf when all sanding marks have disappeared. By running our hands over the surface to feel for a smooth texture, examining the wood under bright light, and comparing it to a reference sample, we can ensure that the sanding process is complete.
When sanding a floating wood shelf, the goal is to achieve a smooth and even surface free of any imperfections. This can be accomplished by starting with a coarse grit sandpaper to remove any rough spots or uneven areas, and then progressively moving to finer grits to refine the surface.
Inspecting the wood under bright light can help reveal any remaining sanding marks or imperfections that may not be visible under normal lighting conditions. By carefully examining the surface from different angles, we can ensure that the wood is properly sanded and ready for finishing.
Comparing the sanded wood to a reference sample can also help ensure that the desired level of smoothness and quality has been achieved. By visually comparing the two surfaces, we can identify any areas that may need further sanding or finishing touches.
In the end, the key to knowing when a floating wood shelf is sanded enough lies in achieving a smooth and flawless surface through careful inspection and comparison. This attention to detail will result in a beautifully finished wood shelf that is ready to be installed and admired in any space.
How to Finish Wood for Floating Shelf?
We start by sanding the wood to create a smooth surface for staining and sealing. Sanding helps to remove any imperfections and rough spots, ensuring a flawless finish for your floating wood shelf.
Next, we apply a rich wood stain that penetrates the grain, enhancing its natural beauty and depth. This step adds warmth and character to the wood, making your floating shelf a standout feature in any room.
To protect the wood and prolong its lifespan, we add a durable coating that acts as a barrier against daily wear and tear. This protective layer ensures that your floating shelf remains both visually stunning and resilient, perfect for showcasing your favorite decor items with confidence.
What Grit Sandpaper for Wood Shelves?
When preparing floating wood shelves for installation, it's crucial to start sanding with 120 grit sandpaper and gradually move to 150 grit before finishing with 220 grit. This process ensures a smooth and professional finish on the wood shelves. It's important to always follow the direction of the wood grain when sanding to achieve the best results.
Using the right sanding tools is essential for achieving a polished and refined look on your floating wood shelves. By following the proper sanding sequence and utilizing the correct grit sandpaper, you can ensure that your shelves have a high-quality finish that enhances the overall appearance of your space. Sanding with precision and care will result in floating wood shelves that are not only functional but also visually appealing.
Conclusion
Sanding floating wood shelves is a meticulous process akin to sculpting a masterpiece from raw stone. Each stroke unveils the hidden beauty within. Moving methodically from coarse to fine grits, examining under different lighting conditions, and addressing any flaws ensures that every shelf reaches its full potential.
When the wood exhibits a consistent color and a smooth texture, our efforts come to fruition, indicating that the sanding process is complete. This commitment elevates ordinary planks into functional works of art, ready to enhance any living space with sophistication.