
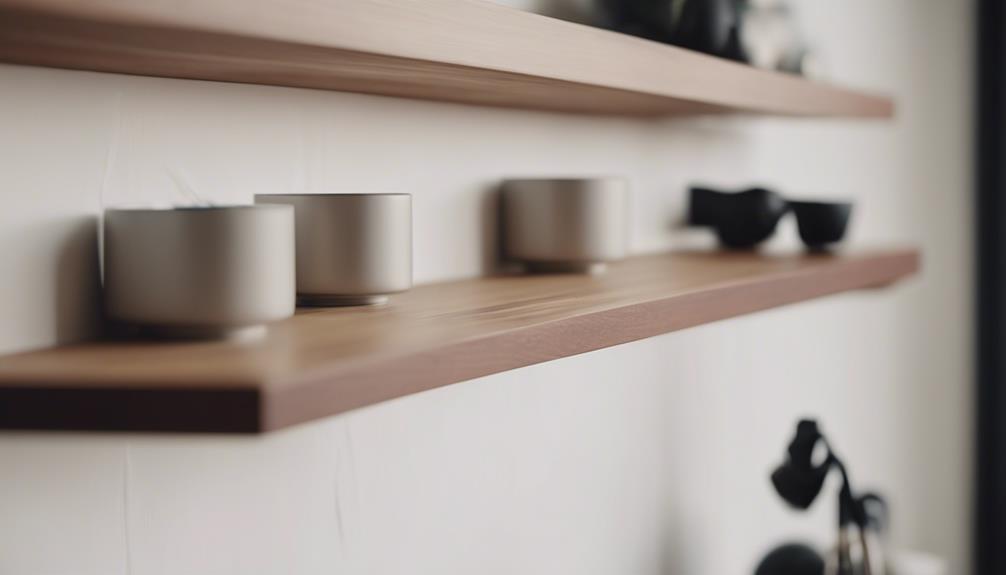
Installing Hidden Shelf Brackets for a Sleek and Minimalist Look
Installing hidden shelf brackets requires precision and the right tools. Start by measuring the space and ensuring level placement for a sleek look. Use a stud finder to locate studs and mark where to drill precise pilot holes. The brackets, made of durable quarter-inch steel, will provide sturdy support for your floating wood shelf.
Once the brackets are securely fastened, carefully position the shelf to align perfectly. Test the shelf's weight-bearing capacity gradually, making adjustments for optimal stability. To maintain a minimalist and sophisticated look, choose decor that complements the natural beauty of the wood shelf.
Selecting high-quality materials for your floating wood shelf, such as solid hardwood or reclaimed wood, will enhance the overall aesthetic appeal. Consider the thickness and finish of the wood to ensure durability and longevity in your design. Additionally, incorporating unique design elements like live edges or custom engraving can add a personalized touch to your floating shelf.
By following these steps and selecting the right materials, you can create a stunning and functional floating wood shelf that will elevate the style of any room.
Remember to regularly maintain and clean your shelf to preserve its beauty and ensure it remains a focal point in your space.
Key Takeaways
For a sturdy and stylish floating wood shelf, opt for quarter-inch steel brackets with an 8-inch arm length. These brackets provide robust and reliable support for your shelf. To achieve a sleek and contemporary look, it's crucial to take precise measurements and ensure level alignment during installation. This attention to detail will contribute to a modern and polished appearance in your space.
When mounting the brackets, remember to drill pilot holes in the wall to prevent wood splitting and to securely attach the brackets. This step is essential for the longevity and stability of your floating wood shelf. Additionally, choose wall anchors that are suitable for the weight of your shelf and the type of wall you are mounting it on. This will further enhance the strength and durability of your shelf installation.
To test the load-bearing capacity and stability of your floating wood shelf, gradually add weight to it. This will help you determine if the shelf is securely mounted and can support the items you intend to display. By following these steps and using the right materials, you can create a minimalist and functional shelf that adds a touch of elegance to your space.
Tools and Materials Needed
To set up floating wood shelves, we'll need a drill, screws, a level, and the Federal Brace hidden shelf brackets. These tools are essential for our installation process.
The brackets are made of sturdy quarter-inch steel, ensuring durability and strength. Their 8-inch arm length and 1-inch mounting slots allow for flexible and easy positioning. This adaptability guarantees that our shelves will align perfectly, even if our initial drill holes aren't exact.
Using a level is crucial for achieving a clean, modern look with our shelves. It ensures that they're perfectly horizontal, avoiding any uneven angles. The drill and screws are what secure the brackets to the wall, providing the necessary support for up to 30 pounds of weight.
Incorporating these hidden shelf brackets into our design not only enhances the visual appeal but also maximizes our wall space efficiently.
Let's embrace this innovative solution and transform our space with style and functionality.
Choosing the Right Brackets
Selecting hidden shelf brackets requires careful consideration of factors like material, size, and load-bearing capacity to ensure they suit our specific needs.
Federal Braces Hidden Shelf Brackets stand out for their exceptional durability and flexibility, making them a popular choice for floating shelf installations.
Crafted from sturdy quarter-inch steel, these brackets are built to support heavier loads and withstand the test of time. With an 8-inch arm length, they offer ample support, making them perfect for a variety of shelving projects. The 1-inch mounting slots on the back allow for versatile positioning, ensuring that our shelves are both secure and visually appealing.
Each bracket has a 30-pound carrying capacity, accommodating a wide range of items and decor pieces. They're also compatible with other floating shelf brackets, expanding our installation options and allowing for a seamless and innovative design.
Here's a breakdown of the key features:
- Material: Constructed from quarter-inch steel for durability and stability.
- Arm Length: 8 inches for substantial support on shelves.
- Mounting Slots: 1 inch for flexible positioning during installation.
- Load Capacity: Can carry up to 30 pounds, suitable for various items.
- Compatibility: Works with other floating brackets for versatile installation options.
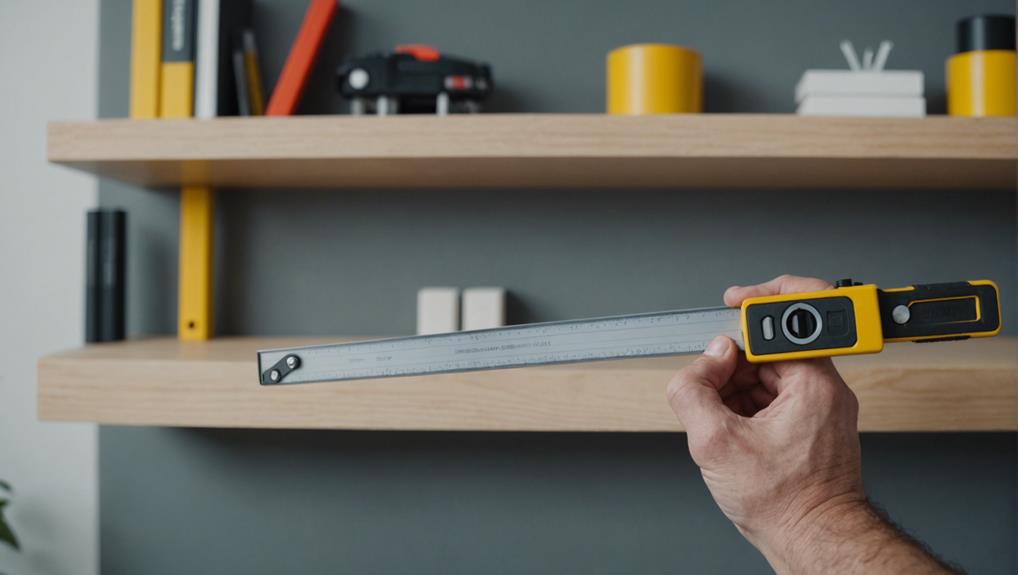
Measuring Your Space
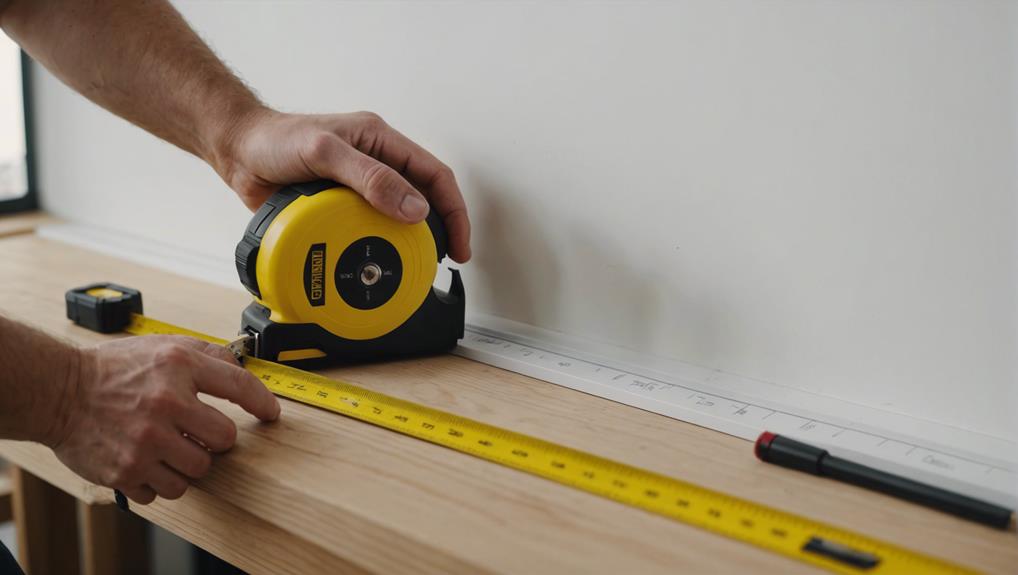
Precisely measuring your space is crucial for ensuring your hidden shelf brackets fit perfectly and provide sturdy support. Begin by measuring the exact width and height of the area where you plan to install your shelves. This step guarantees that your shelves not only fit well but also appear proportionate within the designated space.
Consider the weight and size of the items you intend to showcase. This information helps determine the appropriate spacing between shelves and the number of brackets needed to prevent any sagging. Remember, the proper distance between the brackets is vital for uniform support and a harmonious look.
Ensure that your brackets are level when measuring the space. A level surface is essential for maintaining a clean, modern appearance.
Double-check your measurements, focusing on accuracy to avoid any mistakes that could compromise the stability and aesthetics of your floating shelves.
Marking Pilot Holes
When marking pilot holes for our hidden shelf brackets, accuracy is key. Using a level ensures that our marks are perfectly aligned, providing a secure attachment for our floating wood shelves.
It's crucial to select the right tools for the job, including the correct size drill bit to give the shelves the necessary stability and support.
By focusing on precise measurement techniques and wall stability, we can ensure that our shelves are securely mounted. This attention to detail won't only enhance the aesthetic appeal of the shelves but also contribute to their overall durability.
Accurate Measurement Techniques
Let's begin by marking the exact height for the hidden shelf bracket on the wall using a pencil. Precision is key here. Locating the wall studs is crucial as they provide essential support for the bracket and the shelf itself. Utilize a stud finder to pinpoint these studs and lightly mark their positions with a pencil.
Now, grab a level to draw a straight line across the wall at the chosen height. This line will serve as a guide for marking the pilot holes. Align the bracket along this line and mark the pilot holes through the mounting slots. Keep in mind that these slots typically offer about an inch of adjustability, allowing some flexibility in positioning.
With the marks in place, it's time to drill the pilot holes. Choose a drill bit that matches the size required for the bracket's screws. This step is crucial for a secure installation, ensuring the screws grip firmly into the wall studs. Drill carefully, maintaining a steady hand to keep the holes straight.
Choosing Proper Tools
Selecting the right tools for marking pilot holes is crucial for a smooth and efficient installation process when setting up hidden shelf brackets. Accurate pilot hole marking plays a pivotal role in achieving a flawless and professional-looking shelf installation. Begin by using a pencil or marker to precisely mark the spots where pilot holes will be drilled. This simple yet essential step can greatly impact the final result.
Measuring and marking the pilot hole locations based on the mounting slots of the brackets is essential for a secure installation. Utilizing a dependable measuring tape ensures that our markings are exact. Proper alignment of the brackets with the pilot hole markings is key to ensuring a level and sturdy floating shelf. A level tool can be extremely helpful in achieving this perfect alignment.
In the realm of tools, innovation and precision are closely intertwined. Through meticulous pilot hole marking, we establish a solid foundation for a successful installation. Paying attention to detail during this phase guarantees that the hidden shelf brackets won't only be functional but also visually appealing.
Ensuring Wall Stability
Ensuring wall stability begins by accurately marking pilot holes, which serve as the foundation for securely installing hidden shelf brackets. Achieving that sleek and minimalist look with our floating shelves relies heavily on precision. Using a level, we can mark the pilot holes to ensure a straight and level installation. This meticulous step guarantees that our brackets are aligned correctly, minimizing any potential future instability.
Pilot holes aren't just crucial for alignment but also for protecting the integrity of our walls. By drilling these preliminary holes, we reduce the risk of wall damage and ensure that our brackets are firmly anchored. This is essential for achieving the best weight-bearing capacity, allowing our shelves to support a variety of items without any worries.
Marking pilot holes enables us to position the hidden shelf brackets precisely, contributing to the seamless appearance we desire. It's a simple yet vital part of the installation process that ensures a smooth experience and reduces the chances of misalignment.
Let's not overlook the significance of this step; properly drilled pilot holes are the cornerstone of a successful, stable installation that transforms our space into an innovative, minimalist haven.
Drilling Pilot Holes

Drilling pilot holes is a crucial step in ensuring the precise and secure installation of hidden shelf brackets. This step guarantees that the wood remains intact and that the brackets align perfectly, contributing to the overall stability of our floating shelves. Selecting the correct drill bit size is essential as it ensures a snug fit, further enhancing the durability of the shelves. Properly drilled pilot holes make it significantly easier to insert screws into the wall without risking damage to the bracket or the shelf.
Let's compare the impact of drilling pilot holes versus not drilling them:
| Without Pilot Holes | With Pilot Holes |
|---|---|
| Increased risk of wood splitting | Prevents wood from splitting |
| Challenging screw insertion | Facilitates easier screw insertion |
| Poor bracket alignment | Ensures proper alignment |
| Reduced shelf stability | Enhances stability |
| Shorter shelf lifespan | Increases durability |
Installing Wall Anchors
Let's begin by selecting the most appropriate wall anchors for our project, considering the wall type and the weight of the shelves. We'll explore different types of anchors and their specific purposes to make an informed choice.
After deciding on the anchors, we'll cover important drilling and placement techniques to ensure a strong and secure installation.
When it comes to floating wood shelf materials, it's crucial to consider the weight-bearing capacity and durability of the materials. Opting for high-quality wood like oak or maple can provide both strength and a visually appealing finish. These hardwoods are known for their sturdiness and ability to support heavy items without warping or bending over time.
In terms of hardware and mounting brackets for floating wood shelves, stainless steel brackets offer excellent support and corrosion resistance. These brackets are designed to securely hold the shelves in place while maintaining a sleek and modern aesthetic.
Pairing these brackets with sturdy wall anchors will ensure a reliable mounting system for your floating wood shelves.
Choosing Appropriate Anchors
When installing hidden shelf brackets for our floating wood shelves, the selection of appropriate wall anchors becomes critical in ensuring their durability and stability over time. Wall anchors vary in types, each designed for specific wall materials and weight capacities. To ensure our floating shelves not only exude elegance but also function effectively, it's essential to choose anchors that are tailored to both the size of the bracket and the expected load they'll bear.
Plastic anchors are ideal for lightweight shelves on drywall due to their ease of installation, but they may not be suitable for heavier items. For heavier loads, toggle bolts serve as a robust option as they expand behind the wall, effectively distributing weight. Molly bolts, on the other hand, are a reliable choice for medium-weight shelves with their expanding sleeves that provide superior grip and stability.
It is crucial to consider the weight of the shelf and the items it will hold when selecting the appropriate wall anchors. The proper installation of wall anchors is fundamental in ensuring the stability and long-term robustness of our minimalist shelf designs.
Drilling and Placement Tips
To ensure the secure mounting of our hidden shelf brackets, meticulous planning of drilling and wall anchor placement is crucial. This step is essential to maintain the stability of our shelves and prevent sagging over time.
Here are some key tips for a successful installation:
- Choose High-Quality Anchors: Opt for top-notch wall anchors that align with the weight capacity of the shelf and the wall material. This guarantees even weight distribution and ensures the shelves can withstand the load.
- Drill Precise Pilot Holes: It's vital to drill accurate pilot holes before inserting the wall anchors. These holes guide the anchors into position, ensuring proper alignment and preventing wall damage like cracking or crumbling.
- Achieve Flush Placement: When inserting the wall anchors, ensure they sit flush with the wall surface. This creates a sturdy foundation for the hidden shelf brackets and maximizes the support they provide.
Securing the Brackets
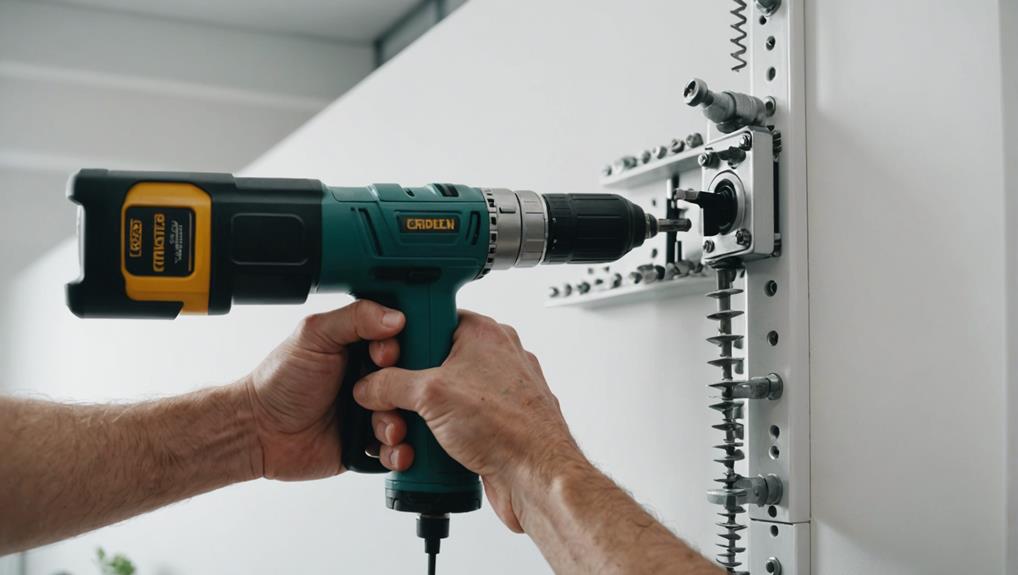
Start by measuring and marking the exact height where each concealed shelf bracket will go. This step ensures precise installation and a clean, modern appearance. Use a level to draw a straight line at the desired height for accuracy. Then, drill pilot holes at the marked spots to prepare for securing the brackets.
The Federal Braces Hidden Shelf Brackets come with an 8-inch arm length and 1-inch mounting slots, allowing for some adjustment during installation. Place the bracket over the pilot holes and use screws to mount it securely. Ensure the screws are tightened to provide sturdy support for the floating shelf, which can hold up to 30 pounds.
Here's a quick overview to highlight important details:
| Bracket Feature | Specification | Importance |
|---|---|---|
| Arm Length | 8 inches | Provides adequate support |
| Mounting Slots | 1 inch | Allows for easy adjustment |
| Carrying Capacity | 30 pounds | Supports heavier items |
Paying attention to these details is crucial for stability and proper installation. Once the brackets are securely in place, your floating shelf will not only be practical but will also enhance the aesthetic appeal of your space. Embrace the innovative design and enjoy the sleek, modern look it brings to your home.
Ensuring Bracket Alignment
To ensure proper alignment of our hidden shelf brackets, it's crucial to:
- Measure carefully
- Drill accurately
- Always use a level
These steps are essential for achieving a professional and polished look, while also ensuring that weight is evenly distributed for optimal stability and safety.
Following these guidelines will help prevent any tilting or sagging, preserving the functionality and aesthetic appeal of our shelves for the long term.
Measure Twice, Drill Once
When it comes to installing floating wood shelves, getting the right hardware and mounting brackets is crucial for a sturdy and visually appealing setup. Precision is key in this process, as even small errors can lead to a less-than-ideal outcome.
So, let's dive into the essential steps to ensure a successful installation.
Start by measuring and marking the exact spots where your shelf brackets will be placed. Use a pencil to mark the height and spacing accurately, ensuring a level and symmetrical look. Double-check your measurements to avoid any alignment issues that could affect the final appearance of your shelves.
Next, drill pilot holes at the marked spots. These initial holes will serve as guides for the screws when attaching the brackets to the wall. Properly drilled pilot holes are essential for stability and to prevent any damage to the wall during installation.
Before drilling, place the brackets against the wall to verify their positioning. This step is crucial in ensuring that the brackets align perfectly with your marks, minimizing the chances of unnecessary holes and guaranteeing that the shelves will be adequately supported.
Use a Level
Once you've confirmed the placement of your brackets, it's time to utilize a level to ensure that your floating wood shelf achieves a flawless and professional appearance. The key here is precision. By using a level, you can guarantee that the hidden shelf brackets are perfectly parallel to the ground, resulting in not only a visually appealing look but also functional efficiency.
To begin, place the level on top of the brackets and make adjustments until the bubble in the level is centered. This indicates that the brackets are precisely horizontal, maintaining the integrity of the minimalist design we're striving for with your floating wood shelf.
Proper alignment of the brackets is crucial as it helps evenly distribute weight, enhancing the stability and longevity of your shelf. Misaligned brackets can lead to an unsteady shelf, compromising both the aesthetics and safety of the installation.
Adjusting Bracket Position
Adjusting the position of hidden shelf brackets plays a crucial role in achieving a perfectly aligned and level installation of your floating shelves. When working with hidden brackets like the Federal Brace model, we benefit from having 1-inch mounting slots on the back, which allow for precise adjustments. This level of adjustability ensures that our shelves not only serve their functional purpose but also contribute to the sleek and minimalist aesthetic we aim to achieve.
To ensure that the shelf position is just right, it's important to follow a few key steps:
- Fine-tune the bracket placement: Utilize the 1-inch mounting slots to shift the brackets slightly until they're perfectly aligned with the desired shelf layout.
- Check alignment frequently: Use a level to confirm that the adjustments are maintaining a straight and level shelf position.
- Secure firmly: Once the brackets have been adjusted, make sure to securely fasten them to prevent any movement over time, thus preserving the integrity of the installation.
Placing the Shelf
Let's begin by identifying the wall studs to ensure our floating wood shelf has sturdy support. We can then utilize a level to double-check that the shelf is perfectly aligned, making any adjustments needed for a harmonious appearance. Through these steps, we can achieve a secure and polished installation.
For the mounting hardware and brackets, it's essential to choose high-quality materials that can support the weight of the shelf and its contents. Opting for durable and reliable hardware will ensure the longevity and stability of the shelf over time. Additionally, following the manufacturer's guidelines for installation will help guarantee a secure and robust mounting system for your floating wood shelf.
Marking Wall Studs
To ensure our concealed shelf brackets offer optimal support, we'll start by pinpointing the wall studs using a stud finder or by tapping the wall. This step is crucial to ensure that our brackets are securely attached to the sturdiest part of the wall. Once we've identified the studs, we'll mark their positions with a pencil or masking tape. This visual guide will show us where the brackets will be installed.
Before moving forward, let's consider the weight capacity of our shelf to prevent any potential sagging or instability. It's important to evenly distribute the brackets along the studs to provide adequate support.
Here's how we'll do it:
- Locating Studs: Utilize a stud finder to precisely locate the studs on the wall. To verify accuracy, tap the wall and listen for a solid sound.
- Marking Studs: Clearly mark the positions of the studs with a pencil or masking tape. These markings will serve as a reference for where the brackets should be placed.
- Double-Checking: Before drilling, double-check the positions of the studs and the markings to avoid any mistakes and ensure precise alignment.
Properly aligning and securing the hidden shelf brackets is essential for achieving a clean and modern look while providing dependable support. This step lays the groundwork for a successful installation.
Ensuring Level Placement
Ensuring our shelf sits perfectly level on the concealed mounting brackets is crucial for both its appearance and stability. To achieve this, we must use a reliable level to ensure the shelf is even and straight. This step is vital for maintaining the sleek and minimalist look we desire.
Next, it's important to check for any necessary adjustments. Even small discrepancies can affect the level placement. Align the shelf carefully to ensure it fits precisely onto the hidden brackets. This alignment isn't just about aesthetics; it also plays a key role in the shelf's ability to securely support items.
Proper placement of the shelf on the hidden brackets improves both stability and visual cohesion. A level placement guarantees that our floating shelf not only looks flawless but also functions reliably, securely holding our items without the risk of tilting or falling. By dedicating time to perfecting this step, we're investing in the durability and practicality of our design.
Ultimately, a meticulously level placement transforms our shelf into a focal point that embodies innovation and elegance. This attention to detail elevates the entire installation, demonstrating our dedication to both form and function in our living space.
Checking Shelf Level
To ensure our floating wood shelf is perfectly aligned and level, we utilize a level as a tool. This step is crucial in achieving a professional and sophisticated appearance for the shelf. A level shelf not only prevents items from sliding or falling off due to uneven placement but also enhances the overall visual appeal and balance of the display.
To align the shelf accurately with the mounting brackets, we follow these steps:
- Place the Level on the Shelf: Lay the level along the length of the shelf to check for evenness. If the bubble in the level is centered, the shelf is level.
- Adjust as Needed: If the bubble isn't centered, make slight adjustments by loosening the brackets and repositioning the shelf until it's perfectly level.
- Double-Check Alignment: After making adjustments, recheck the shelf with the level to ensure it remains level and aligned with the brackets.
Aligning the shelf precisely with the hidden brackets contributes to the overall sleek and minimalist aesthetic we're striving for. The accuracy of this step is paramount as it forms the foundation for a successful installation.
Taking the time to meticulously level the shelf ensures a secure and visually stunning final result, combining both form and function seamlessly.
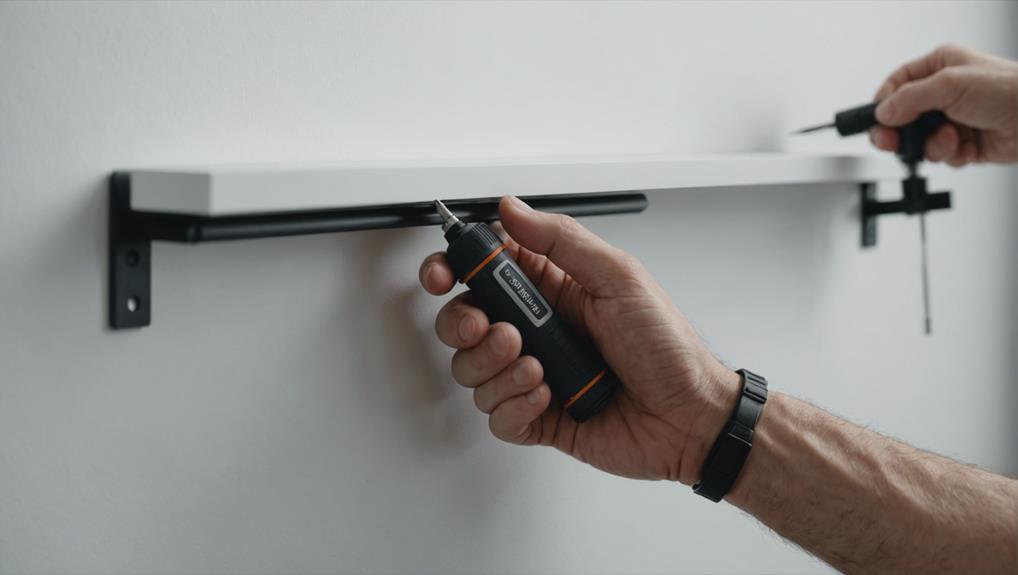
Securing the Shelf
Securing the shelf requires attaching it firmly to the mounting brackets concealed behind the wall to ensure stability and safety. It's crucial to align the shelf perfectly with the hidden brackets to maintain a clean and minimalist look while providing strong support for the shelf.
The first step involves sliding the shelf onto the hidden brackets to create a snug fit, which is essential for stability. Using a level, we confirm that the shelf is perfectly horizontal, making any necessary adjustments by slightly repositioning the shelf before securing it in place. Once the shelf is aligned, we use appropriate fasteners, such as screws or specialized hardware designed for hidden brackets, to lock the shelf securely.
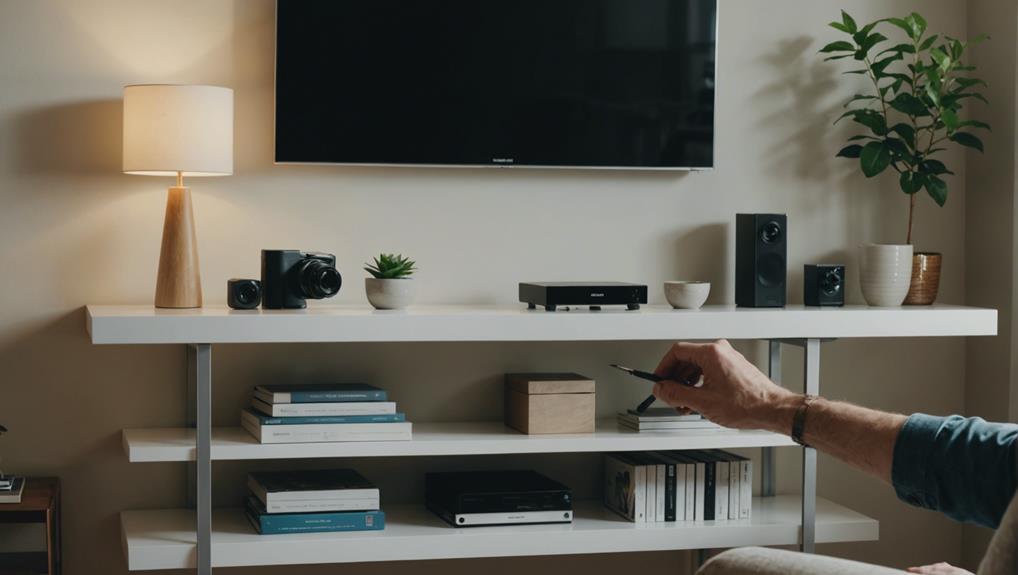
Weight Testing the Shelf
Let's commence the process of testing the weight-bearing capacity of our floating wood shelf by gradually adding items to ensure it can safely accommodate the intended load. This approach aids in validating the strength of our concealed shelf brackets, guaranteeing they can support the total weight without any issues.
To establish a systematic and comprehensive procedure, we'll proceed as follows:
- Books: We'll start by placing a few books on the shelf. Books, known for their substantial weight, can swiftly expose any vulnerabilities in the shelf's stability.
- Decorative Items: Following that, we'll introduce decorative items like vases, photo frames, or small sculptures. These items are common fixtures on shelves and will assist us in assessing the shelf's real-world performance.
- Kitchen Supplies: If the shelf is designated for kitchen use, we can test it by adding kitchen supplies such as jars of spices or small appliances, which come in varying weights and can serve as a stress test for the brackets.
Throughout this evaluation, it's crucial to observe for any indications of instability or sagging.
It's essential to compare the total weight placed on the shelf with the specified weight capacity provided by the bracket manufacturer.
Should any instability be detected, it may signify the necessity for adjustments to ensure the floating shelf remains securely affixed and capable of supporting its load without compromising stability.
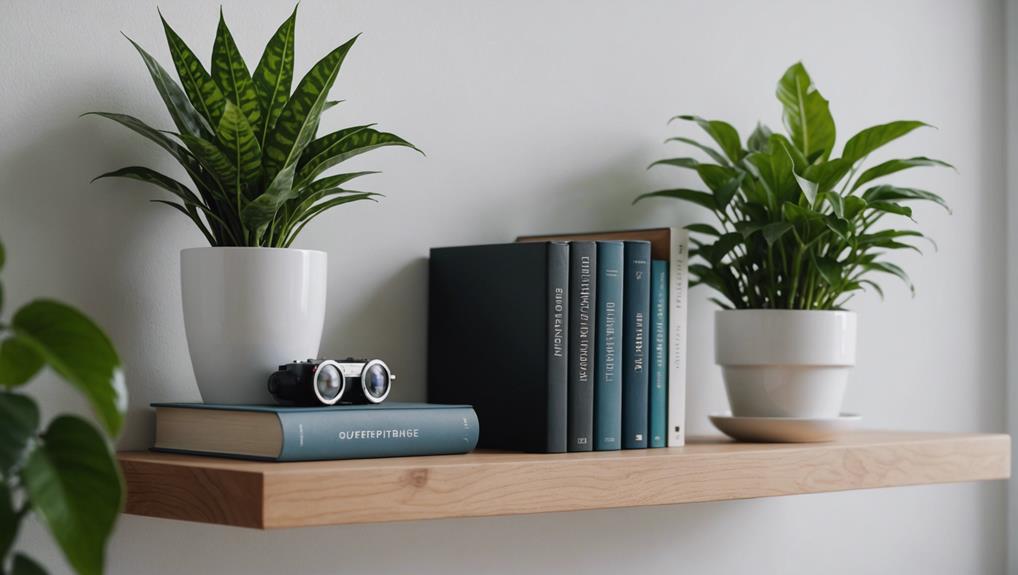
Styling the Shelf
Now that we've ensured the shelf is stable, let's focus on enhancing its overall aesthetic. To achieve a sleek and minimalistic look, we should consider using simple decor and items with clean lines. Choosing neutral colors or a monochromatic scheme will maintain the modern and minimalistic vibe that complements our concealed shelf brackets.
The material of the floating shelf plays a significant role in the overall design. Whether we opt for wood or glass, it should align with the room's minimalistic style for a cohesive appearance. The wall above the shelf presents a great opportunity to introduce a pop of color and visual interest. Placing greenery or artwork there can create a balanced and appealing display.
To avoid clutter, let's focus on selecting a few carefully chosen pieces. This approach ensures that each item enhances the room's aesthetic without overwhelming the shelf. Here are some styling ideas to consider:
| Minimalist Decor Ideas | Neutral Colors | Shelf Material |
|---|---|---|
| Clean-lined vases | White | Wood |
| Sculptural objects | Beige | Glass |
| Small potted plants | Gray | Wood |
| Framed artwork | Black | Glass |
Maintenance Tips
Regular maintenance plays a vital role in preserving the quality and functionality of our floating wood shelf hardware and mounting brackets. By implementing a few simple upkeep practices, we can ensure that our shelves maintain their elegant and modern appeal.
To start, it's important to regularly dust and clean the shelf brackets to uphold their appearance. Dust can accumulate rapidly within the brackets, so a quick wipe-down with a soft cloth can go a long way in maintaining their aesthetic appeal.
In addition, it's advisable to conduct periodic checks on the shelf brackets for any signs of rust or damage. This proactive approach enables us to address minor issues before they escalate. Here's a brief checklist to guide you:
- Check for rust: Utilize a rust remover if necessary and apply a protective coating to prevent future corrosion.
- Inspect for damage: Tighten any loose screws and replace any damaged brackets to ensure structural integrity.
- Weight management: Avoid placing excessive weight on the shelves to prevent undue stress on the brackets.
Frequently Asked Questions
How to Disguise Shelf Brackets?
To disguise shelf brackets, one can utilize decorative covers that blend seamlessly with the shelf or wall color. Opting for finishes that match the overall aesthetic of the room or customizing the design can help in seamlessly integrating the brackets into the innovative decor scheme.
When it comes to floating wood shelves, the choice of hardware and mounting brackets plays a crucial role in ensuring both functionality and aesthetics. Selecting high-quality hardware that supports the weight of the shelf is essential for its durability and stability. Additionally, choosing mounting brackets that complement the style of the shelf can enhance the overall look of the installation.
Incorporating decorative elements such as unique brackets or hardware can add a touch of personality to floating wood shelves. By selecting hardware that not only serves its functional purpose but also adds visual interest, one can elevate the design of the shelves and make them stand out as a focal point in the room.
How Do You Install Concealed Shelf Brackets?
When installing floating wood shelves, it's crucial to mark precise pilot holes for the concealed shelf brackets. This step ensures that the brackets are securely mounted, providing stability and allowing for customizable alignment. By using high-quality concealed shelf brackets, you can achieve a seamless and minimalist look for your floating shelves.
Incorporating innovative functionality into your floating wood shelves, these concealed shelf brackets offer a sleek and modern design. Their hidden installation method creates a clean and unobtrusive appearance, perfect for showcasing your decor items without any visible support hardware. With the right hardware and precise mounting, your floating shelves will not only look stylish but also be sturdy and durable.
How to Hang a Shelf Invisibly?
To hang a shelf invisibly, start by securely fastening the concealed brackets to the wall, ensuring they are level. Next, effortlessly slide the floating shelves onto the brackets, creating a seamless and modern appearance that enhances any room's decor.
When selecting materials for your floating wood shelves, opt for high-quality hardwoods like oak, maple, or walnut. These durable and visually appealing woods not only provide a sturdy base for your shelves but also add a touch of elegance to your space.
To ensure your floating shelves are securely mounted, choose heavy-duty mounting brackets that can support the weight of your desired items. Look for brackets made from strong materials such as stainless steel or iron to guarantee long-lasting stability and reliability.
How to Disguise Wall Brackets?
To disguise wall brackets, consider using decorative covers that seamlessly blend with the wall color. You can also enhance the area by incorporating plants or artwork to divert attention away from the brackets. Opt for thick floating shelves and strategically place them at varying heights to create a sleek and minimalist design.
When choosing materials for floating wood shelves, prioritize durability and aesthetic appeal. Solid wood, such as oak or walnut, provides a timeless and elegant look. Engineered wood, like MDF or plywood, offers a more cost-effective option without compromising on style.
For hardware and mounting brackets, opt for sturdy and reliable options to ensure the shelves can support the weight of your items. Concealed brackets or floating shelf hardware can add a modern touch while maintaining the illusion of a floating shelf.
Conclusion
We've installed concealed shelf brackets for a modern, understated look, and it's truly transformative. Armed with the necessary tools and precise measurements, we've turned our space into a clutter-free sanctuary.
These brackets aren't only practical but nearly invisible, creating the illusion of shelves floating in mid-air. After securely fastening and conducting weight tests, the shelves are holding up admirably, combining both elegance and sturdiness.
Now, let's relish in our beautifully organized space, filled with confidence in our skilled handiwork and the remarkable outcome.