
Overcoming Challenges in Leveling Floating Wood Shelves
To ensure the levelness of floating wood shelves, it is crucial to address issues such as uneven walls and inaccurate measurements before installation. Utilizing precise tools like a tape measure, spirit level, and wall stud detector is essential for achieving accuracy in the placement of the shelves.
By securing brackets directly to wall studs, we can enhance stability, and using shims when necessary helps to counteract any wall imperfections that may affect the alignment.
Properly preparing the installation area is a critical step in the process. It involves checking the smoothness of the wall surface to ensure a seamless fit for the shelves. By verifying alignment at multiple points and evenly distributing weight across the shelves, we can prevent any potential sagging issues that may arise over time.
These meticulous steps not only guarantee a perfectly leveled shelf but also enhance both functionality and aesthetics in the room.
By following these meticulous steps and paying attention to detail during the installation process, you can achieve a flawlessly leveled floating wood shelf that adds both practicality and visual appeal to your space. For more tips and tricks on perfecting your shelf installation, continue to explore and refine your skills in this area.
Key Takeaways
To achieve a perfectly level floating wood shelf, it is crucial to utilize a reliable spirit or laser level. This tool will ensure that the shelf is horizontally aligned with precision, enhancing both the aesthetic appeal and functionality of the installation.
When securing brackets for the floating shelf, prioritize locating and anchoring them to wall studs for optimal stability. Wall studs provide the necessary support to hold the weight of the shelf and its contents securely in place. This step is essential to prevent any potential sagging or instability over time.
In cases where the wall surface is uneven, shims can be employed to adjust and compensate for any irregularities. By using shims strategically, you can effectively level the shelf and create a seamless, professional-looking installation.
Throughout the installation process, it is recommended to verify the alignment of the shelf at multiple points. This approach helps to identify any potential issues early on and make necessary adjustments to maintain a level surface. Consistent monitoring of the shelf's alignment can prevent future problems and ensure long-term stability.
Lastly, it is important to adhere to weight limits specified for the floating wood shelf. Overloading the shelf can lead to structural issues and compromise its stability. By following weight guidelines, you can prevent damage and maintain the integrity of the installation for years to come.
Identifying Common Issues
When tackling the task of leveling floating wood shelves, we often encounter common issues such as uneven walls and inaccurate measurements. These challenges can be daunting, especially for those striving for a sleek and modern aesthetic. Uneven walls can disrupt the alignment of the shelves, leading to tilting or sagging over time. To address this, it's crucial to carefully examine the wall surface for any irregularities that could affect the level installation.
Inaccurate measurements pose another frequent obstacle. Even a small miscalculation can result in shelves that are misaligned, detracting from both the visual appeal and functionality of the design. Precision in measuring is key; verifying dimensions ensures a perfect fit for our shelves.
Furthermore, ensuring overall stability is essential. Insufficient support or reinforcement can cause shelves to sag, endangering both safety and appearance. Using appropriate mounting hardware tailored to the wall type can significantly improve the stability of the installation.
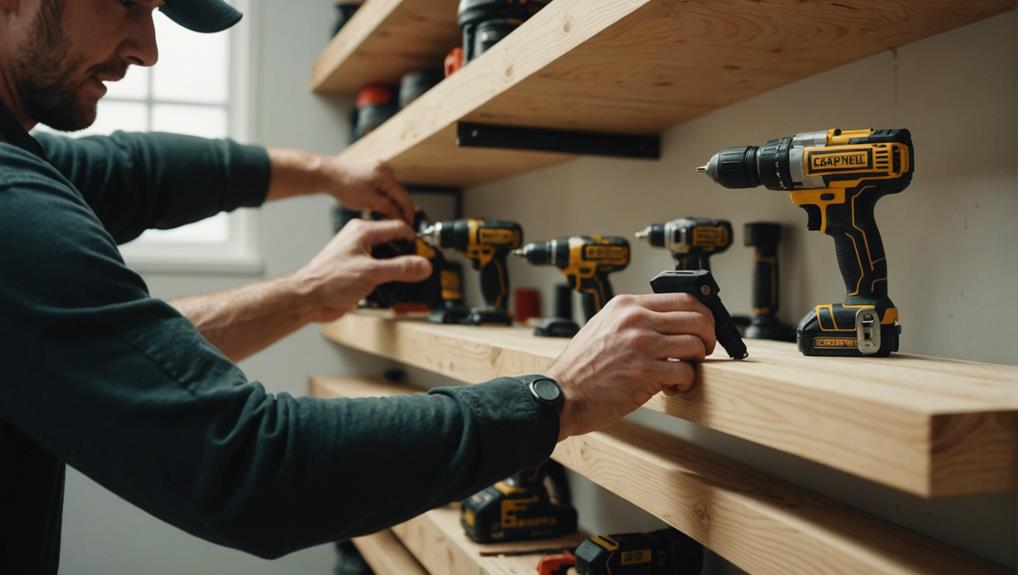
Tools and Materials Needed
For ensuring the perfect alignment of our floating wood shelves, we require a few crucial tools and materials. Let's begin with indispensable measuring tools like a tape measure and a level, which are essential for marking precise placements.
Additionally, we'll need robust shelf mounting hardware and possibly shims or spacers to accommodate any wall irregularities.
Would you like further assistance with floating wood shelf installation?
Essential Measuring Instruments
To ensure the precise installation of floating wood shelves, we require specific measuring instruments that guarantee accuracy and stability. Utilizing the appropriate tools is crucial for achieving a professional appearance and long-lasting durability. Let's delve into the essential instruments necessary for this task.
A spirit level is absolutely essential for this project. It allows us to determine both horizontal and vertical alignment, ensuring that our shelves are perfectly straight and level. Even the slightest deviation can impact the overall look and functionality of the shelves.
Additionally, a measuring tape is vital for accurate spacing and positioning. Attention to detail is key; by measuring distances meticulously, we can avoid any errors and maintain consistency in the placement of our shelves.
Lastly, a wall stud detector is indispensable for locating sturdy wall studs. Attaching the brackets to studs guarantees that our shelves are securely mounted, capable of supporting weight without any risk of instability.
In summary, the key tools we need are:
- Spirit level – for precise alignment.
- Measuring tape – for accurate measurements.
- Wall stud detector – for secure mounting.
Equipped with these essential instruments, we can confidently tackle the task of leveling floating wood shelves, ensuring a harmonious blend of elegance and functionality in our space.
Let's proceed with assurance, knowing that we've the necessary tools for the job.
Shelf Mounting Hardware
When it comes to preparing our walls for floating wood shelves, the selection of the right hardware is crucial. It ensures that our shelves are sturdy, level, and securely attached, preventing any potential tilting or sagging issues. Careful consideration of tools and materials is essential to achieve a professional finish.
One of the first steps is anchoring our brackets into wall studs for added stability. This is vital to ensure that the floating shelves can bear weight without compromising their balance. Using a stud finder can help accurately locate these wall studs. Additionally, a level is indispensable for ensuring that our shelves have a straight and well-balanced appearance.
Let's break down the essential tools and materials needed for this task:
- Stud Finder: This tool is used to locate wall studs, providing the necessary stability for the mounting brackets.
- Level: Ensures that the shelves are perfectly straight, adding to their overall aesthetic appeal.
- Drill: Used to create holes for the brackets to be mounted securely.
- Measuring Tape: Provides accurate measurements for precise installation.
- Screwdriver: Necessary for tightening screws and brackets securely.
Utilizing top-quality mounting hardware and following precise installation procedures are key factors in overcoming challenges related to leveling floating wood shelves. Accurate measurements and alignment play a critical role in achieving a straight, well-balanced shelf that complements the look of any modern space. By adhering to these guidelines, we can confidently install floating shelves that not only serve their purpose but also enhance the visual appeal of the room.
Leveling Assistance Tools
Leveling floating wood shelves demands specific tools for precision and stability. A crucial tool to have is a dependable level for ensuring straightness and evenness.
For precise alignment during installation, utilizing a laser level is highly recommended. This advanced tool offers a cutting-edge solution for those seeking accuracy and efficiency in their shelf installation.
In addition to the level, shims play a vital role in achieving a perfectly balanced shelf. These small, adjustable pieces are essential for filling any gaps between the shelf and the wall, allowing for fine-tuning of the level. They provide a simple yet effective way to ensure the shelf is perfectly aligned.
Furthermore, wall anchors are key for providing stability and support to floating shelves. By securely fastening the shelves to the wall, these anchors help prevent any potential tilting or slipping, ensuring the shelves remain in place.
In summary, here are the essential tools for leveling floating wood shelves:
- A reliable level tool for straight and even shelves.
- A laser level for precise alignment during installation.
- Shims for adjusting the level by filling gaps between the shelf and the wall.
Always remember to check the level of the shelves at different points to ensure overall balance and alignment.
Checking Wall Levelness
Let's start by checking the wall's levelness before we install the floating wood shelves. Ensuring that the wall is perfectly plumb and level is crucial for a successful installation. If the wall isn't leveled correctly, it can result in crooked or unstable shelves, which not only look unattractive but also pose a safety risk.
To check the wall's levelness, we'll place a level tool horizontally along different sections of the wall. This will help us identify any uneven areas or imperfections. If the bubble in the level tool isn't centered, it indicates that the wall isn't straight.
Here's a breakdown of the process:
- Use the level tool to place it horizontally on the wall.
- Mark any uneven sections with a pencil.
- Measure the discrepancies using a measuring tape.
- Correct any imperfections with shims or fillers.
- Re-check to ensure that corrections have been made accurately.
Addressing these imperfections is crucial. By using shims or fillers, we can fix any unevenness and create a straight and level surface. Our meticulous approach to wall leveling guarantees that our floating wood shelves won't only be stable but also visually appealing, showcasing precision and innovation in every detail.
Preparing the Installation Area
Before diving into the installation of our floating wood shelves, we need to carefully assess the installation area to ensure a flawless and secure fit. Our initial task is to confirm that the wall where the shelves will be mounted is impeccably level and smooth. Using a level tool, we can easily detect any deviations from a straight and even surface. Even the slightest wall imperfections can have a significant impact on the alignment of our floating shelves, so it's crucial to address these issues preemptively.
Furthermore, we must also survey the area for any potential obstructions that could impede our installation process. It's important to take note of electrical outlets, plumbing fixtures, or any other protrusions that may pose challenges during the installation. By identifying and resolving these obstacles ahead of time, we can streamline the installation process and avoid any unforeseen complications.
Lastly, precise measurements are key to achieving the perfect placement of our floating shelves. We need to carefully measure the height and spacing for each shelf to ensure both an aesthetically pleasing look and optimal functionality in the space. Taking the time to measure accurately will ultimately contribute to the success of our installation project.
To summarize:
- Confirm wall flatness: Use a level tool to detect and correct any wall imperfections.
- Identify and resolve obstacles: Check for any potential hindrances such as electrical outlets or plumbing fixtures.
- Take accurate measurements: Measure meticulously to achieve the ideal placement of our floating shelves.
Using Locator Screws
When setting up floating wood shelves, the use of locator screws becomes crucial for ensuring their stability and levelness, especially on uneven walls. These screws offer the necessary flexibility to address imperfections in the wall surface, making them essential for achieving a polished and professional look. By incorporating locator screws into our installation process, we can effectively compensate for any deviations in the straightness of the walls, guaranteeing that our shelves not only appear visually appealing but also remain securely in place for the long term.
The precision of locator screws is a key advantage, allowing us to make fine adjustments to the positioning of the shelves. This capability proves invaluable in overcoming challenges such as the need for base plate adjustments and avoiding potential obstructions like door handles. Unlike conventional fasteners, locator screws enable us to make minute changes that ensure our floating wood shelves are perfectly leveled, even if the walls themselves aren't entirely straight.
In addition to their leveling function, locator screws also play a significant role in enhancing the overall structural integrity of our installation. By distributing weight evenly across the shelves, these screws reduce stress on specific points and contribute to the longevity of the shelves. Essentially, by utilizing locator screws, we can transform what could have been a problematic installation into one that's smooth, secure, and durable—showcasing our commitment to innovative solutions in modern home design.
Adjusting the Base Plate
Now that we've secured the locator screws, let's focus on fine-tuning the base plate to ensure our floating wood shelves are perfectly level. Ensuring precise alignment of the base plate is crucial for the stability and overall aesthetics of our floating shelf brackets and shelves.
To begin, it's important to check the wall for any irregularities. If there are any bumps or uneven areas, using shims or spacers can help us correct these imperfections. Addressing any protrusions or obstacles behind the base plate is essential to ensure a flush fit against the wall.
Next, let's grab a level to double-check the horizontal alignment of the base plate. This step is critical in preventing any potential tilting or sagging of our shelves. If needed, we can make slight adjustments to the position of the base plate to accommodate any deviations in the wall surface.
In summary, here are the key steps to adjust the base plate:
- Inspect for wall irregularities and utilize shims if necessary – This guarantees a smooth foundation for our shelves.
- Address any obstacles behind the base plate – Removing hindrances ensures optimal alignment.
- Verify horizontality using a level – This final verification solidifies the alignment of the base plate.
Refitting the Shelf
To ensure our floating wood shelves are perfectly aligned and secure, it's crucial to refit them properly. If the shelf isn't level or encounters interference issues, adjustments must be made. This could involve repositioning the shelf, modifying its structure, or addressing any mounting hardware concerns.
Start by examining the holes where the screws and wall anchors are placed. If these holes are misaligned, it can disrupt the entire setup. Carefully take out the shelf and check the base plate and back plate for any discrepancies. If the holes are off-center, consider redrilling them for a more accurate fit, ensuring stability and alignment.
Consider using locator screws to help secure the shelf in the correct position. These screws serve as guides that assist in repositioning the shelf accurately. Sometimes, slight modifications to the shelf's design, like adjusting its length or thickness, can also help resolve any alignment issues.
Adding Additional Support
When adding support to our floating wood shelves, we need to focus on proper bracket installation techniques and utilizing wall studs effectively.
Correctly installing brackets ensures stability, while anchoring shelves to wall studs provides the necessary strength to support heavier items.
Let's delve into these methods to ensure our shelves aren't only sturdy but also perfectly level.
Bracket Installation Techniques
To ensure our floating wooden shelves are level and sturdy, it's crucial to securely attach the brackets into wall studs for optimal support. The key to a strong setup lies in ensuring that each shelf bracket is firmly secured. This helps distribute the weight evenly and prevents any potential sagging or tilting.
For added stability, consider incorporating wall blocking, especially for heavier installations. Wall blocking reinforces the area behind the drywall, making it more resilient and capable of handling greater weight.
To enhance the security of our shelves, follow these steps:
- Select Durable Brackets: Opt for top-quality brackets to ensure durability and long-term support.
- Attach to Multiple Studs: Installing brackets into multiple studs maximizes weight capacity and reduces the risk of shelves pulling away from the wall.
- Boost with Wall Blocking: Incorporating wall blocking provides additional support and helps distribute the load more effectively.
Wall Stud Utilization
It's crucial to utilize wall studs for extra support when leveling floating wood shelves. Wall studs are essential for ensuring the stability and weight-bearing capacity of our shelves. These vertical framing members within our walls serve as a strong anchor point, helping to secure floating shelves effectively. By fastening shelves directly into these studs, we significantly reduce the risk of sagging or tilting over time.
Properly distributing weight on floating shelves anchored to wall studs not only helps maintain a level installation but also ensures long-term durability. This method prevents leveling issues and provides a more secure foundation for our shelves, enabling them to support substantial weight without compromising structural integrity.
Here's how utilizing wall studs enhances weight-bearing capacity:
| Factors | Without Studs | With Studs |
|---|---|---|
| Stability | Low | High |
| Weight Capacity | Limited | Substantial |
| Risk of Sagging | High | Low |
| Durability | Short-term | Long-term |
Dealing With Door Handle Interference
Let's start by tackling door handle interference through adjusting the placement of the floating wood shelf. The positioning of the shelf plays a crucial role in preventing any contact that might hinder the door's functionality.
Here's our step-by-step approach:
- Assess the Space: Measure the distance from the door handle to the wall and mark it on the wall. This ensures that the floating wood shelf stays clear of the door handle's area.
- Use a Level: Position the shelf parallel to the ground and the door handle. Using a level guarantees that the shelf is perfectly horizontal, minimizing the chance of future interference.
- Adjust Height: Sometimes, a slight adjustment in height can resolve conflicts. Ensure that the door handle can swing freely without any obstructions.
Securing Brackets to Studs
Securing brackets to studs is vital to ensure that your floating wood shelves remain stable and capable of bearing weight effectively. Without proper anchoring, floating shelves are at risk of sagging or detaching, which can compromise both their appearance and functionality. To begin, we must locate the wall studs using a reliable stud finder. This tool helps us pinpoint the precise positions for our brackets, ensuring that they align perfectly with the studs for optimal support.
Identifying the stud locations is essential before drilling into them. It's recommended to drill into multiple studs rather than just one to enhance the shelf's weight capacity. This method helps distribute the load across a wider area, reducing stress on any single point and minimizing the chances of sagging.
Additionally, using high-quality screws and anchors specifically designed for stud mounting is crucial. These fasteners provide a secure hold, preventing the brackets from loosening over time due to weight or vibrations.
Ensuring Shelf Stability
To ensure the stability of our floating wood shelves, it's crucial to pay close attention to detail during the installation process. Achieving stability involves following precise steps that will make our Aksel Floating Shelf not only level but also durable.
Begin by using a level to confirm that the shelf is straight and even. This step is essential to prevent instability and potential damage.
Next, securely fasten the shelf brackets into the wall studs. This ensures that the shelf won't shift or fall under weight.
Here is a simple three-step guide to highlight the significance of these actions:
- Accuracy: Double-check the level to ensure that it's perfectly straight.
- Sturdiness: Attach brackets to wall studs to maximize stability.
- Alignment: Utilize shims or spacers if the wall isn't completely straight.
Final Adjustments and Safety Checks
Now that our shelves are up, let's check their alignment with a level. Make any adjustments needed to ensure they're perfectly straight.
Confirm that the brackets are securely attached to the wall studs for maximum stability.
Lastly, check the weight limits to ensure they can safely hold the items you plan to display.
Verify Shelf Alignment
Let's ensure our floating wood shelf is perfectly aligned both horizontally and vertically. It's crucial for the shelf to be securely attached to the wall, not only for aesthetics but also for safety. A crooked shelf or one that detaches from the wall is something we definitely want to avoid.
To begin, we'll use a level to check the shelf's alignment. Placing the level on the shelf will help us verify if it's flat and horizontal. Any necessary adjustments can be made at this stage to ensure a balanced look.
Next, we should inspect the mounting hardware, including the brackets and screws, to confirm that they're sturdy and reliable. This step is essential in preventing any potential safety hazards that could arise from weak or faulty hardware.
Lastly, it's important to distribute the weight on the shelf evenly. Ensuring that items placed on the shelf are balanced will help prevent sagging and potential damage over time.
Secure Brackets Firmly
Once the shelf's alignment is verified, it's crucial to firmly secure the brackets to ensure the shelf's stability and safety. Properly attaching the floating shelf brackets to a wall stud is essential for maintaining stability.
Using a level to confirm the shelf is perfectly aligned before finalizing the installation is a key step. Any slight misalignment can impact both the functionality and aesthetics of the shelf.
Following this, it's important to make any necessary final adjustments to the brackets. Carefully inspect all connections and screws, tightening them as needed to prevent potential hazards. Taking the time for thoroughness in this step is vital to guarantee the long-term security of the shelf.
If wood glue has been used during the installation, allowing sufficient time for it to dry before proceeding is recommended. This not only provides an additional layer of security but also aids in preserving the shelf's position.
Inspect Weight Limits
Verifying the weight limits of floating wood shelves is crucial to ensure they can safely support the items intended for display. To prevent any potential mishaps, a thorough inspection of weight limits is necessary. If a shelf shows signs of sagging, it indicates the need for adjustments to avoid structural issues.
Here's a simple checklist to help us through this essential process:
- Refer to Manufacturer's Guidelines: Always check the weight limit specifications provided by the manufacturer to avoid overloading the shelves.
- Rebalance Weight Distribution: If a shelf is sagging, redistribute the items to evenly distribute the load and prevent further structural problems.
- Secure Mounting Hardware: Confirm that all brackets and screws are tightly secured to support the designated weight capacity.
Innovations in home design call for careful attention to these details. After confirming the weight limits, it's important to conduct comprehensive safety checks. This involves ensuring that the shelves are securely fastened to the wall and can withstand the specified weight capacity.
Promptly addressing any structural issues or concerns with hardware is essential for maintaining the stability and durability of our floating wood shelves. By combining safety and style, we can enhance the functionality and aesthetic appeal of our living spaces.
Frequently Asked Questions
How Do You Fix Uneven Floating Shelves?
Let's correct those uneven shelves by adjusting the bracket alignment and ensuring the wall anchors are securely in place. Using a spirit level, we can make precise adjustments and incorporate shims if necessary to achieve a balanced and stable result.
When it comes to floating wood shelves, proper installation is key to their functionality and aesthetic appeal. By paying attention to details like bracket alignment and wall anchor stability, we can create a visually pleasing and innovative display that enhances the overall look of the room.
To start, it's essential to use the spirit level to ensure that the shelves are perfectly horizontal. This step may require some patience and fine-tuning, but the end result will be well worth the effort. Additionally, adding shims where needed can help address any remaining unevenness and provide a solid foundation for the shelves.
Once the shelves are level and secure, reinstalling them with precision will further enhance their stability. By taking the time to make these adjustments, you can enjoy the beauty and functionality of your floating wood shelves for years to come.
How to Level a Sagging Floating Shelf?
Picture our shelf as a bridge in need of reinforcement. We begin by adjusting the brackets and strengthening the anchors, ensuring a sturdy base. Each step taken transforms a drooping structure into a beacon of dependability and ingenuity.
Should Floating Shelves Be Level?
Yes, floating shelves should always be level. Achieving a level installation is crucial for both the aesthetic appeal and the functionality of the shelves. By using a level tool during the installation process, you can ensure precise alignment and avoid any unevenness that may detract from the overall look of the shelves.
Properly aligned floating shelves not only enhance the visual appeal of a room but also contribute to the balance and harmony of the space. When shelves are level, they create a sense of order and organization, allowing you to display items with confidence and style. So, whether you are installing floating shelves in your living room, bedroom, or office, make sure to take the time to ensure they are perfectly level for the best results.
Why Is My Floating Shelf Tilting Upwards?
Let's be honest, our floating wood shelf is tilting upwards because of some unconventional bracket placement or unreliable wall anchors. Making sure they are firmly attached to wall studs and routinely checking their alignment can resolve this creative dilemma.
Conclusion
In conclusion, we've tackled the common hurdles of ensuring level floating wood shelves. By assessing the wall's levelness, meticulously preparing the installation site, and anchoring brackets securely to studs, we've established the foundation for shelf stability.
By utilizing the appropriate tools and following precise techniques, we've simplified this task and made it more manageable. Through careful final adjustments and thorough safety checks, we've achieved a polished and professional outcome.
Our journey underscores the significance of thorough planning and precise execution in crafting durable and visually appealing shelving solutions.