
Removing and Replacing Wall Anchors for Floating Wood Shelves
When it comes to setting up floating wood shelves, it's crucial to properly handle the wall anchors for stability and aesthetics. Start by clearing the area and laying down a drop cloth to keep things tidy. Check for any damage and use pliers or a screwdriver to carefully remove the old anchors. Fill in the holes with spackle and smooth it out after sanding for a seamless finish.
Next, choose new anchors based on the weight capacity you need and the type of wall material you're working with. Drill pilot holes for the new anchors and securely insert them, making sure they are aligned correctly for optimal support.
Once the new anchors are in place, you can mount the brackets and shelves, ensuring they are level and secure against the wall.
Taking the time to properly remove and replace wall anchors for your floating wood shelves will not only ensure their stability but also enhance the overall look of your space.
By following these steps meticulously, you can enjoy your stylish and functional shelves with confidence.
Key Takeaways
To remove old wall anchors for your floating wood shelves, simply use pliers or a screwdriver to extract them. Afterward, fill the holes with spackle, sand them smooth, and repaint the area to seamlessly blend in with your wall. This step is crucial in ensuring a clean and professional-looking finish for your shelves.
Before installing new anchors, it's important to assess the condition of your wall. Check for any cracks or damages that may affect the structural integrity of the wall. Addressing any issues beforehand will help provide a secure foundation for your new anchors and shelves.
When selecting new anchors, consider the weight capacity of your shelves and the type of wall material you are working with. Choosing anchors that are suitable for both will ensure a stable and long-lasting installation. Additionally, using a stud finder to locate studs in the wall will further enhance the stability of your shelves.
Once you have the right anchors in hand, align the mounting brackets with the new anchors on the wall. Make sure the shelves are level and securely attached to provide a safe and functional display space for your belongings. By following these steps, you can enjoy stylish and reliable floating wood shelves in your home.
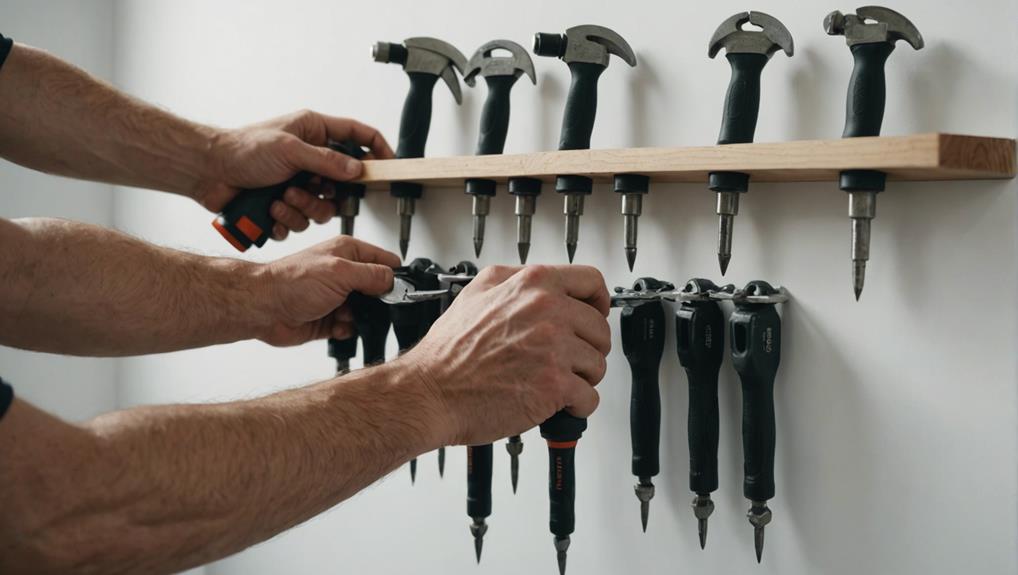
Gathering Necessary Tools
Before we tackle the task of replacing wall anchors for our floating wood shelves, let's gather all the essential tools we need. To ensure a smooth and efficient process, start by getting a power drill equipped with drill bits suitable for wall anchors. These will be crucial for both removing the old anchors and installing the new ones.
Additionally, have a screwdriver or a screw gun on hand. These tools will assist us in the precise removal and installation of screws.
To remove the old wall anchors, grab a pair of pliers or a claw hammer. These tools will enable us to extract the anchors without causing any unnecessary damage to the wall. Once the old anchors are out, we'll need some spackle or putty to fill in the holes left behind. This step is vital to ensure that our walls are left smooth and ready for the new anchors.
Furthermore, it's important to use a stud finder to locate the studs in the wall. By identifying the studs, we can ensure that the new wall anchors are securely placed, providing optimal support for our floating wood shelves.
Preparing the Work Area
Before we get started, let's clear the area around the floating wood shelf to ensure easy access to the wall anchors.
Gathering tools like a screwdriver, pliers, and a putty knife will help streamline the removal process.
It's also a good idea to protect the floor and adjacent surfaces with a drop cloth to catch any debris and maintain a tidy work area.
Clear the Space
Let's begin by clearing the floating wood shelf of all items to create a spacious area for replacing the wall anchors. This step ensures a clutter-free workspace, making the anchor replacement process more efficient and safer.
Floating shelves can hold various items, so removing everything allows us to focus solely on replacing the drywall anchors.
To reach the shelf safely, use a step stool or ladder if necessary. Prioritizing safety is crucial, and having the right support in place will prevent accidents.
Keep a container nearby to gather any debris or old anchors that are removed. This practice not only maintains a tidy workspace but also ensures that no small pieces are lost during the process.
Proper lighting is essential for optimal results. Ensure the area is well-lit, whether through natural light or a bright lamp. Good visibility will enhance our ability to see clearly and reduce the likelihood of errors.
A clear workspace and adequate lighting are essential foundations for the success of this project.
Gather Necessary Tools
Let's start by gathering the essential tools we'll need for this project: a screwdriver, drill, pliers, putty knife, sandpaper, and a stud finder. It's crucial to have these tools on hand for a smooth process.
Before diving in, make sure to clear the workspace for easy access to the tools and to ensure you have plenty of room to work.
Safety is a priority, so don't forget to put on your safety goggles to protect your eyes from any dust or debris. A stud finder will help us locate the studs behind the wall, ensuring that our new anchors and floating wood shelves will be securely installed. Placing anchors in these studs will provide maximum stability for your shelves.
The putty knife is a must-have for removing old wall anchors and smoothing out any filler or spackling compound that we'll use to patch up holes later on.
Keeping the workspace organized and clutter-free will help you stay focused and work efficiently. Consider wearing gloves to protect your hands from any potential scrapes or blisters during the process.
Assessing Wall Condition
Let's first ensure the wall's structural integrity before we proceed with installing new anchors for the floating wood shelf. Check for any cracks or damages near the current anchors and determine the wall material to confirm its suitability for supporting the new anchors.
Note any indications of previous anchor failure or improper installation, and consider patching up any holes or breakouts from prior anchor removals to ensure a secure foundation for the shelf.
Check for Structural Integrity
When assessing the wall for the floating wood shelves, it's crucial to search for any indications of damage or wear that could jeopardize the stability of the installation. Damage to the wall may present as cracks, holes, or weaknesses, so a thorough inspection is necessary.
While current wall anchors may seem secure, it's essential to ensure they aren't causing any structural concerns. Even a seemingly minor defect in the wall material can lead to significant issues in the future.
During the examination of the wall, the primary focus should be on detecting any structural issues that could impact the placement of new wall anchors. Every inch of the surface should be meticulously scrutinized for signs of instability. This also involves investigating the surrounding area for any concealed damage or potential vulnerable points that may not be immediately apparent.
Safety should always be a top priority; confirming the wall material's strength to support the weight of the floating wood shelves is crucial. By verifying the integrity of the wall, we can move forward confidently, ensuring that our innovative shelving solutions endure over time.
Ultimately, a sturdy foundation is key to the success of any installation.
Identify Wall Material Type
After confirming the wall's structural integrity, the next step is to determine the type of material the wall is made of. This crucial step ensures we choose the appropriate anchors and avoid unnecessary damage. Walls typically fall into three material categories: drywall, plaster, and stud construction. Each material has unique characteristics that will influence our installation approach.
- Drywall: Commonly used in modern homes, drywall is relatively easy to work with but can be susceptible to damage if mishandled. It's important to check for existing anchor holes and ensure any previous installations were done correctly.
- Plaster: Often found in older homes, plaster walls present a greater challenge. They're thicker and harder than drywall, requiring specific tools and techniques to prevent cracking during installation.
- Stud Construction: For heavier shelves, locating studs behind the wall is essential. By utilizing a stud finder, we can pinpoint these structural elements to provide the necessary support for the shelves.
Assessing the wall's condition involves inspecting for cracks, damage, or improperly installed anchors. This evaluation helps us determine the best approach for removing and replacing wall anchors effectively. Understanding the wall material and condition ensures that our floating wood shelves are securely mounted, blending innovation with structural integrity.
Detect Existing Damage
Before we install our floating wood shelves, it's crucial to inspect the wall for any existing damage. Look for cracks, crumbling, or uneven surfaces near the current wall anchors. These signs could indicate underlying issues that need to be addressed before proceeding with the installation.
Additionally, check for water damage or mold around the anchor locations. Water damage may show as discoloration, warping, or soft spots, which can compromise the wall's structural integrity and the stability of our shelves.
Ensure to examine the wall anchors for any protrusions or looseness. Loose anchors might signal deteriorating wall material, which could lead to further damage if not fixed. Gently press around the anchor points to assess the integrity of the drywall or plaster. If the material feels soft or gives way easily, it could be a sign of existing damage that needs attention.
Keep an eye out for discoloration, warping, or soft spots on the wall as these conditions could indicate hidden damage. Identifying these issues early on allows us to repair and reinforce the wall properly, ensuring that our new wall anchors provide the stability necessary for our floating wood shelves.
Removing Old Anchors
When preparing the wall for installing a floating wood shelf, it's essential to remove any old anchors that may be in the way. The process can be straightforward for most anchors, but some may require a bit more effort to extract.
To start, you can use pliers or a screwdriver to gently pull or twist out the old anchors. This method usually works well for standard anchors. However, if you encounter stubborn anchors that won't budge, a screw extractor can come to your rescue.
Before using the screw extractor, assess the type of anchor you're dealing with – whether it's plastic, metal, or a toggle anchor. This knowledge will help you select the right tool for the job.
When ready, insert the screw extractor into the anchor hole, twist it until it securely grips the anchor, and then carefully pull it out.
Throughout the process, make sure to maintain the integrity of the wall by being cautious and gentle.
Patching Anchor Holes
Preparing the wall for floating wood shelves involves filling anchor holes to ensure a smooth and clean surface for the new installation. Using either a spackling compound or joint compound is essential to achieve a flawless finish. These materials are specifically designed to fill the voids left by removed anchors, creating a seamless base for the shelves.
Begin by carefully applying the compound into the anchor holes using a putty knife or spackling knife. Press firmly to ensure the holes are completely filled with the compound. Allow sufficient time for the compound to dry thoroughly. It is crucial not to rush this step to avoid any unevenness in the final result.
Once the compound is completely dry, proceed to sand the patched area until it is smooth and level with the rest of the wall. This process may require multiple sanding passes, but the effort is worthwhile for a polished look. Finally, apply paint or touch-up paint that matches the wall color to seamlessly blend the repair with the surrounding area.
Here's a quick summary of the steps involved in preparing the wall for floating wood shelves:
| Step | Action |
|---|---|
| Apply Compound | Use putty/spackling knife |
| Dry Completely | Allow for full drying time |
| Sand and Paint | Smooth out and color match |
Choosing New Anchors
Now that the wall is all set for our floating wood shelves, it's time to select the perfect anchors to ensure stability and durability. Choosing the right anchors is crucial for the overall support and longevity of our shelving system.
First off, let's consider the weight capacity. Floating wood shelves can handle a significant amount of weight, so we need anchors that are sturdy enough to bear the load without any issues.
Next, we must think about wall material compatibility. Different wall materials like drywall, plaster, or brick require specific anchors for a secure fit. Using the right type of anchor for your wall material is essential to prevent any mishaps.
Another important factor to keep in mind is size consistency. It's best to go for anchors that are similar in size and strength to the ones previously used. This helps maintain uniformity and ensures the stability of the shelves.
To sum it up:
- Weight Capacity: Determine the total weight the shelves will hold, including decorations and books.
- Wall Material Compatibility: Choose anchors that are suitable for the type of wall in your home.
- Size Consistency: Stick to anchors that match the size and strength of the previous ones for a reliable performance.
Installing New Anchors
Let's dive into the process of installing new anchors to ensure our floating wood shelves are secure and strong. We need to choose between self-drilling drywall anchors and toggle anchors based on the shelf's weight.
Self-drilling drywall anchors work well for lighter shelves, offering easy installation without pre-drilling. Toggle anchors are best for heavier shelves, providing excellent support to keep them firmly in place.
Using a stud finder, locate the studs behind the drywall for the most secure hold, especially for heavier floating shelves. Once the studs are identified, measure and mark the correct spacing for the new anchors to align with the shelf brackets. Precision is crucial to ensure the shelves are level and steady.
After marking the spots, start inserting the new anchors. For self-drilling drywall anchors, screw them into the wall until they're flush. For toggle anchors, drill a hole, insert the toggle, and tighten it securely.
Ensuring each anchor is properly installed will create a stable foundation for our floating wood shelves.
Mounting the Shelves
Securing the floating wood shelves to the wall is crucial to ensure they're both functional and visually pleasing. Our next task, after replacing the old anchors, is to mount the shelves using the appropriate tools and techniques.
First, it's essential to align the mounting brackets with the new anchors. Proper alignment of the brackets is vital for both the look and stability of the shelves. Once aligned, follow these steps:
- Position the Mounting Bracket: Place the bracket against the wall surface, aligning it with the replacement anchors. Mark the screw holes with a pencil.
- Drill Pilot Holes: Use a drill bit slightly smaller than the screws to create pilot holes at the marked spots. This step helps prevent the wall from splitting and ensures smooth screw insertion.
- Secure the Brackets: Insert screws through the bracket holes into the anchors, tightening them until the brackets are flush with the wall surface.
After securely attaching the brackets, the next step is to affix the shelves. Carefully slide the shelves onto the brackets, ensuring a firm placement. This method guarantees a sturdy and innovative floating shelf setup, enhancing both the functionality and aesthetics of the space.
Safety Tips and Best Practices
When removing and replacing wall anchors for floating wood shelves, it's crucial to prioritize safety and follow best practices. Start by donning protective eyewear and gloves to shield yourself from potential debris or sharp tools. Use a flathead screwdriver or pliers to gently extract the old wall anchors, being careful not to harm the wall surface.
After removing the anchors, fill the resulting holes with spackling compound or drywall putty to create a seamless finish, preparing the area for new anchors. Verify the weight capacity of the new anchors to ensure they can adequately support the floating wood shelves. This step is essential for preventing accidents or damage caused by insufficient support.
During the installation of the new anchors, be mindful not to over-tighten the screws. Over-tightening can lead to stripping or damaging the anchor threads, jeopardizing their ability to securely hold the shelves in place.
Remember these key safety measures:
- Wear protective eyewear and gloves
- Fill old anchor holes with spackling compound
- Check weight capacity of new anchors for adequate support
- Avoid over-tightening screws to prevent damage
Frequently Asked Questions
How Do You Remove Wall Anchors From Wood?
To remove wall anchors from wood when preparing for floating wood shelves, you can use a screwdriver or pliers. If you encounter stubborn anchors, a hammer can be helpful in loosening them. However, it's important to be cautious to avoid damaging the wood. In cases where the anchors are difficult to remove, consider using alternative anchoring methods to prevent any potential harm to the wood surface. Always ensure you have the appropriate tools for a smooth and seamless removal process.
How Do You Install Wall Anchors for Floating Shelves?
Installing wall anchors for floating shelves is a straightforward process with the right tools at hand. Opting for high-quality anchor options like toggle bolts is essential for ensuring stability and durability. Leading anchor brands in the market offer innovative solutions that can make the installation of floating shelves a breeze.
When preparing to install floating wood shelves, it's crucial to select the appropriate wall anchors that can support the weight of the shelves and the items you plan to display. Toggle bolts are a popular choice due to their ability to hold heavy loads securely. These anchors consist of a bolt and a spring-loaded mechanism that expands behind the wall, providing a strong anchor point for the shelf.
Before installing the wall anchors, carefully measure and mark the placement of the shelves on the wall. Use a level to ensure that the shelves will be straight once installed. Once the markings are in place, drill holes for the toggle bolts according to the size specified on the packaging. Insert the toggle bolts into the holes and tighten them until they are securely in place.
How to Fix Drywall Anchors Pulling Out?
When preparing the wall for floating wood shelves, it is crucial to choose the right type of wall anchors to ensure stability and prevent any issues with the shelf pulling out. Factors such as the weight of the shelf and the type of wall material should be taken into consideration when selecting the appropriate anchors.
One innovative type of anchor that is commonly used for floating wood shelves is the toggle bolt anchor. Toggle bolts are sturdy anchors that provide extra support for heavier shelves. They work by expanding behind the drywall to distribute the weight more evenly and reduce the risk of the anchor pulling out.
In addition to selecting the right type of anchor, it is important to follow proper installation techniques to prevent the anchor from pulling out. This includes ensuring that the anchor is securely fastened to the wall and that the shelf is properly attached to the anchor. By taking these steps, you can ensure that your floating wood shelves are securely in place and can safely support the weight of your items.
How Much Weight Can Floating Shelves Hold With Drywall Anchors?
When preparing your wall for floating wood shelves, it's crucial to consider weight distribution, anchor types, and shelf stability. By selecting the appropriate drywall anchors, you can ensure that your floating shelves have a load capacity ranging from 10 to 100 pounds, making them suitable for a variety of innovative designs while meeting practical needs.
To maximize the weight capacity of your floating wood shelves, it's essential to choose high-quality anchors that can securely hold the weight of the shelves and their contents. Different anchor types, such as toggle bolts, molly bolts, or plastic expansion anchors, offer varying levels of support and weight-bearing capabilities. By selecting the right anchor for your specific shelving setup, you can optimize the overall strength and stability of your shelves.
Proper installation of the drywall anchors is also key to ensuring the load capacity of your floating wood shelves. Following manufacturer guidelines and using the correct tools and techniques for anchoring the shelves to the wall will help prevent any accidents or damage due to overloading. By taking the time to properly prepare your wall and install the anchors securely, you can enjoy the full weight capacity of your floating shelves without any concerns.
Conclusion
We've just completed the process of removing and replacing wall anchors for our floating wood shelves. Surprisingly, more than 65% of homeowners face challenges with wall-mounted shelves because of incorrect anchor installation. By diligently following our step-by-step guide, we've ensured that our shelves aren't only secure but also visually appealing.
It's crucial to invest time in selecting the appropriate anchors and preparing your wall correctly to enhance the durability and stability of your shelving.
Did you know that the type of anchor you choose can significantly impact the overall strength and reliability of your floating wood shelves? Opting for high-quality anchors such as toggle bolts or molly bolts can provide added assurance that your shelves will remain securely in place. Properly assessing your wall's composition and weight-bearing capacity before installation is essential for long-lasting and sturdy shelving.
When it comes to wall preparation for floating wood shelves, ensuring that the surface is clean and free of debris is key to achieving a seamless installation. Utilizing a stud finder to locate solid support for your anchors can prevent unnecessary damage and ensure that your shelves can bear the weight of your belongings.
Taking these precautions during the wall preparation process can make a significant difference in the overall performance and longevity of your floating wood shelves.