
Sanding and Smoothing Wall Surface for a Professional Finish
When it comes to preparing walls for floating wood shelves, having the right tools is essential. You'll need items like a stud finder, a level, a drill, screws, anchors, a pencil, and a measuring tape. These tools ensure that your shelves are securely mounted and level on the wall, providing a sturdy and professional finish.
To start the process, locate the studs in the wall using a stud finder. Mark these positions with a pencil to ensure that your shelves are anchored securely. Using a level, draw a straight line where you want your shelves to be placed. This step is crucial for maintaining a neat and organized appearance.
Next, drill pilot holes into the wall at the marked stud locations. This will make it easier to insert the screws and anchors for mounting the shelves. Be sure to use the appropriate size of screws and anchors to support the weight of the shelves and items you plan to place on them.
Once the shelves are mounted, step back and admire your handiwork. The floating wood shelves will not only provide a functional storage solution but also add a touch of elegance to your space.
With the right tools and careful installation, you can achieve a professional finish that enhances the overall look of your walls.
Key Takeaways
- Select a fine-grit sandpaper with a grit size of 220 or higher to achieve a polished and smooth surface for your floating wood shelf installation.
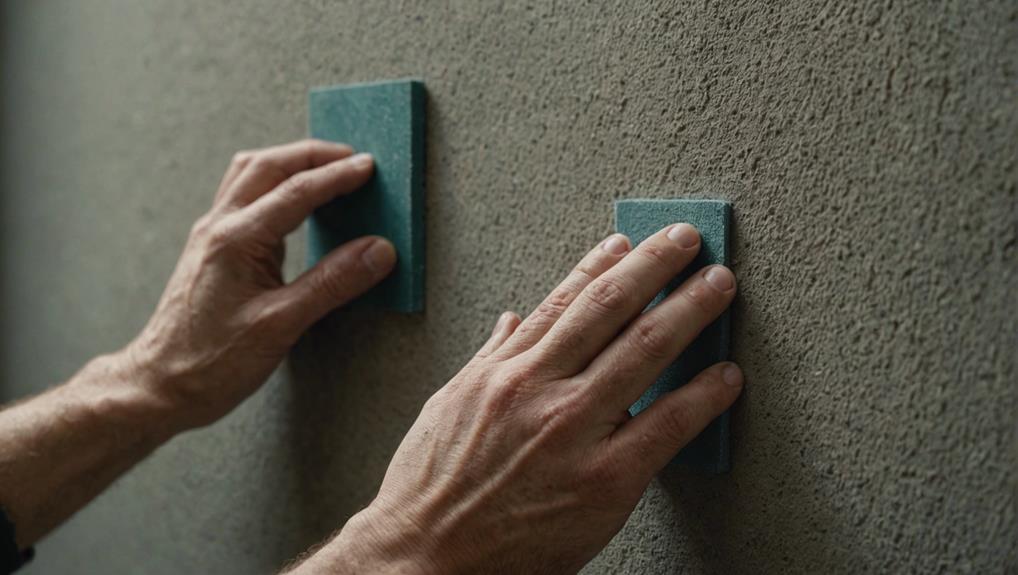
- Utilize sanding blocks to apply even pressure while smoothing out the wall surface, ensuring seamless transitions for a professional finish.
- Opt for wet-sanding with a damp sponge to minimize dust particles in the air and to create a sleek, polished look on the wall.
- Following sanding, remember to prime the surface to seal and prepare it for painting, enhancing the durability and longevity of your floating wood shelf.
- After sanding and priming, thoroughly clean the walls to eliminate any remaining dust and debris, providing a clean canvas for the installation of your floating wood shelf.
Essential Tools and Materials
To achieve a flawless finish on floating wood shelves, essential tools like levelers, stud finders, and wood filler are necessary. These tools ensure precision and stability during installation. Levelers help us align the shelves perfectly, while stud finders locate the best anchoring points on the wall for secure mounting. Wood filler is essential for covering up any imperfections in the wood, creating a seamless look.
For those tricky corners and edges, corner clamps and sanding blocks are invaluable tools. Corner clamps hold the shelves in place while we work on them, ensuring a professional and even finish. Sanding blocks help us smooth out any rough spots or uneven surfaces, creating a polished appearance.
A high-quality drill with the right drill bits is crucial for securely attaching the shelves to the wall. Using the correct size and type of drill bit ensures a strong and lasting hold. Additionally, a stud sensor is essential for locating the wooden studs behind the drywall, providing a sturdy anchor for the shelves.
Safety is paramount when working with tools. Wearing safety goggles and gloves protects us from potential injuries, while a dust mask prevents inhalation of harmful particles during sanding. Using a drop cloth or tarp underneath the work area helps protect floors and furniture from dust and debris.
Innovative solutions like magnetic stud finders and laser levels can streamline the installation process and ensure accurate results. These tools make the task more efficient and help achieve a professional-looking finish for floating wood shelves.
Preparing Your Workspace
Before we dive into sanding, let's set up our workspace for optimal efficiency. Begin by protecting the floors and furniture with drop cloths or plastic sheeting to shield them from dust and debris. Seal off the room by closing doors and covering doorways with plastic sheeting to contain dust and maintain a clean environment.
It's crucial to remove baseboards and outlet covers before sanding. This not only safeguards these fixtures but also allows for a seamless wall surface. By clearing these elements, we ensure easy access to every part of the wall, facilitating a thorough sanding process.
Make sure to gather all the necessary tools beforehand. You'll need sanding tools, safety gear such as masks and goggles, and a sturdy ladder to reach high sections of the wall. Having all supplies ready will streamline your workflow and help you focus on achieving a professional finish.
Choosing the Right Sandpaper
Choosing the perfect tools for floating wood shelf installation on your walls is crucial for a seamless and professional outcome. Let's explore the key tools needed for wall preparation to ensure a sturdy and visually appealing finish.
When it comes to floating wood shelf installation, having the right tools at hand is essential. To start off, a stud finder is indispensable for locating the wall studs where the shelves will be mounted. This ensures that the shelves are securely attached to the wall, providing stability for your displayed items.
Additionally, a level is a must-have tool to guarantee that your shelves are perfectly straight and aligned, enhancing the overall aesthetic appeal of the installation.
In the realm of wall preparation, sandpaper plays a vital role in achieving a smooth surface for mounting the shelves. Beginning with a coarser grit, around 80, helps to remove imperfections and create a foundation for a flawless finish.
As you progress towards the final touches, opting for finer grits, such as 220 and above, refines the surface texture and eliminates any minor scratches, preparing the wall for the shelves' installation.
For the ultimate polished look, utilizing high grit numbers like 400 is key. This fine sandpaper ensures a pristine finish that enhances the visual appeal of the floating wood shelves. Consider incorporating wet sanding into your process by using a damp sponge alongside fine sandpaper.
This technique minimizes dust and results in an even smoother surface, providing a cleaner workspace and a controlled application for a professional outcome.
Sanding Drywall Mud
Preparing your walls for floating wood shelves requires specific tools to ensure a flawless installation. These tools are essential for achieving a professional finish that will enhance the aesthetic appeal of your space.
To start, you'll need a stud finder to locate the wall studs where you'll anchor your floating wood shelves securely. Stud finders use sensors to detect the presence of studs behind the drywall, providing you with the necessary information to mount your shelves safely.
Next, a level is crucial for ensuring that your floating wood shelves are perfectly straight. A level helps you avoid any tilting or unevenness in the shelves, providing a visually pleasing and functional display area for your belongings.
Additionally, a drill with the appropriate drill bits is necessary for drilling pilot holes into the wall studs for the shelf brackets. This step is essential for ensuring the stability and strength of your floating shelves, preventing them from coming loose or falling over time.
Lastly, a measuring tape is indispensable for accurately measuring the spacing and placement of your floating wood shelves. Precision is key when installing shelves, and a measuring tape helps you achieve the desired layout and symmetry in your wall display.
Wet-Sanding Techniques
Now that we've sanded the drywall mud, let's dive into the world of wet-sanding for a smoother, cleaner finish. Wet-sanding involves using a damp sponge or sandpaper to smooth drywall compound, drastically reducing the amount of dust produced during the process. This technique not only ensures a tidier workspace but also helps us achieve a polished, professional look.
Understanding the benefits of wet-sanding is crucial for success:
- Dust Reduction: Wet-sanding significantly decreases airborne dust particles, making it perfect for indoor projects where cleanliness is key.
- Mess Minimization: By utilizing a damp sponge or sandpaper, we can keep the work area neat and tidy, cutting down on post-project cleanup.
- Scratch Prevention: The moisture content helps prevent scratches on the wall surface, resulting in a flawless final finish.
Wet-sanding is a highly effective method for refining wall imperfections. Gently gliding a damp sponge over the drywall compound allows us to smooth out any uneven spots without creating a dusty mess. This approach not only maintains a cleaner workspace but also promotes a healthier environment by reducing the inhalation of dust particles.
Using Sanding Blocks and Sponges
When deciding between tools for preparing floating wood shelves, it's essential to consider the appropriate grit size for the task at hand to ensure optimal results.
Employing the right sanding techniques, such as applying even pressure and using circular motions, can greatly impact the final smoothness and flawlessness of the surface.
By utilizing these adaptable tools effectively, we can easily eliminate any imperfections and get our walls ready for installing floating wood shelves.
Whether you're smoothing out rough edges or prepping the surface for a sleek finish, selecting the correct grit size is crucial.
Consistent pressure and circular movements are key to achieving the desired smoothness for your floating wood shelves.
Choosing the Right Grit
Selecting the right tools for floating wood shelf installation is crucial for achieving a seamless and professional finish on your walls. When preparing the wall surface for floating wood shelves, it's recommended to start with a medium-grit sanding block. This tool effectively smoothens imperfections without causing damage to the wall.
Sanding blocks with contoured edges are essential for reaching corners and edges during the wall preparation process. These tools ensure a uniform surface, creating a seamless transition from the wall to the floating wood shelves.
For the final touch before installing the shelves, opt for fine-grit sanding sponges with a grit of 220. These sponges provide a gentle touch to the wall surface, preserving its integrity and preparing it for the shelving installation.
Proper Sanding Techniques
Learning how to properly prepare your walls for floating wood shelves requires the right tools to achieve a professional finish. Utilizing sanding blocks and sponges is essential for ensuring a flawless result. Sanding blocks are versatile tools that can efficiently smooth drywall seams and imperfections, providing a seamless surface for your shelves. By selecting the appropriate grit, such as a fine 220, you can control the abrasiveness to match your project's requirements.
Wet sanding with a damp sponge is a smart technique to minimize dust and maintain a cleaner work area. This method not only reduces mess but also gives you better control over the sanding process. The damp sponge helps achieve a polished look, seamlessly blending joint compound for a more refined finish on the walls.
Feathering edges with sanding blocks is crucial for creating smooth transitions between different surfaces, ensuring a professional and seamless appearance. Effective blending of joint compound is key to achieving a uniform surface that's ready for painting or wallpapering.
Final Surface Preparation
In the final surface preparation stage, we carefully examine the wall for any flaws to ensure a smooth, uniform surface before painting. Using fine-grit sandpaper is crucial for eliminating rough spots, bumps, and ridges caused by joint compound, guaranteeing a professional look. This meticulous approach is essential for achieving a high-quality, polished finish.
After sanding, it's important to prime the walls to seal the surface, improve paint adhesion, and create a consistent base for painting. Here are the key steps to follow:
- Sanding: Use fine-grit sandpaper to smooth out imperfections and achieve a flawless finish.
- Priming: Apply a top-quality primer to seal the surface and prepare it for painting.
- Wall Cleaning: Thoroughly clean the walls after sanding to remove any dust or debris.
Paying attention to detail during this phase is crucial for a flawless, professional outcome. Wall cleaning is particularly vital as any leftover dust can affect the final result by getting trapped under the paint.
Proper preparation, including sanding, priming, and cleaning, sets the foundation for a seamless, professional look that will make a statement. By focusing on each step diligently, we can attain a stunning result that showcases our expertise and dedication to quality.
Frequently Asked Questions
Can You Sand a Wall to Make It Smooth?
Yes, sanding a wall to achieve a smooth surface is absolutely possible. By utilizing the right sanding techniques and tools, we can effectively address any imperfections in the drywall or wall texture. Proper surface preparation, selecting the correct grit sandpaper, and efficient dust management are essential steps to ensure a seamless application of primer for a flawless finish.
When it comes to floating wood shelf tools for wall preparation, it's crucial to have the appropriate equipment on hand. Tools such as sanding blocks, sandpaper with varying grits, and dust masks are essential for achieving a smooth and even surface on your wall before installing floating shelves. These tools not only help in smoothing out imperfections but also ensure that the wall is properly prepped for the installation of the shelves.
How Much Does a Smooth Wall Finish Cost?
Estimating the cost of achieving a smooth wall finish involves considering contractor rates, labor expenses, material costs, surface preparation requirements, wall repair needs, and the application of primer. DIY projects can help save money, but hiring professionals ensures a high-quality finish. It is essential to carefully plan your budget to ensure a successful outcome.
When it comes to preparing your walls for floating wood shelves, having the right tools is crucial. Some essential tools for wall preparation include a stud finder to locate the studs in the wall, a level to ensure the shelves are straight, a drill for securing the shelves, and a measuring tape for precise placement. Additionally, sandpaper and a putty knife can be useful for smoothing out any imperfections on the wall before installing the shelves.
How to Get a Smooth Paint Finish on Walls?
To achieve a flawless finish when installing floating wood shelves on your walls, you will need a few essential tools. These tools include a stud finder, a level, a drill, screws, anchors, a pencil, and a measuring tape.
Start by using the stud finder to locate the studs in your wall. This will ensure that your floating wood shelves are securely attached and can hold the weight of your items. Next, use a level to mark where you want to install the shelves, ensuring they are straight and evenly spaced.
After marking the spots for your shelves, use a drill to create holes in the wall for the screws and anchors. Make sure to use the appropriate size drill bit for the screws and anchors you are using. Once the holes are drilled, insert the anchors and then attach the brackets for the shelves.
What Is a Smooth Wall Finish Called?
A Level 5 finish is the term used to describe a smooth wall finish achieved through techniques like plaster repair, skim coating, and joint compound application. This finish involves thorough surface preparation, wall patching, primer application, and advanced finishing methods to eliminate drywall texture and imperfections.
When preparing walls for floating wood shelves, it is essential to ensure a Level 5 finish for a seamless look. The tools needed for this task include a putty knife for applying joint compound, a drywall sander for smoothing the surface, and a taping knife for precise application. These tools help in achieving a smooth and flawless finish on the walls, making them ready for installing floating wood shelves.
Achieving a Level 5 finish not only enhances the aesthetic appeal of the walls but also provides a perfect base for mounting floating wood shelves securely. By using the right tools and techniques, you can create a polished and professional look in your space.
Conclusion
Perfectly aligning with our pursuit of a polished wall finish is mastering the techniques of sanding and smoothing. Through the utilization of the right tools and materials, meticulous workspace preparation, and careful selection of suitable sandpaper, we can ensure a flawless outcome.
Employing a combination of dry and wet-sanding methods, along with the use of sanding blocks and sponges, further enhances the surface quality. These meticulous steps lead to a pristine and seamless wall surface, primed for painting or finishing, showcasing our unwavering dedication to excellence in every aspect.
When it comes to preparing floating wood shelves for installation on our newly smoothed wall surface, having the appropriate tools is crucial. Essential items such as a stud finder, level, drill, screws, and a mounting bracket are indispensable for ensuring the shelves are securely and accurately mounted.
By incorporating these tools into our installation process, we can guarantee a sturdy and visually appealing display for our space. Incorporating these meticulous steps and utilizing the necessary tools not only ensures a professional finish for our walls but also facilitates the seamless installation of floating wood shelves.
This comprehensive approach showcases our commitment to precision and excellence in both the preparation of our walls and the creation of functional and aesthetically pleasing storage solutions.