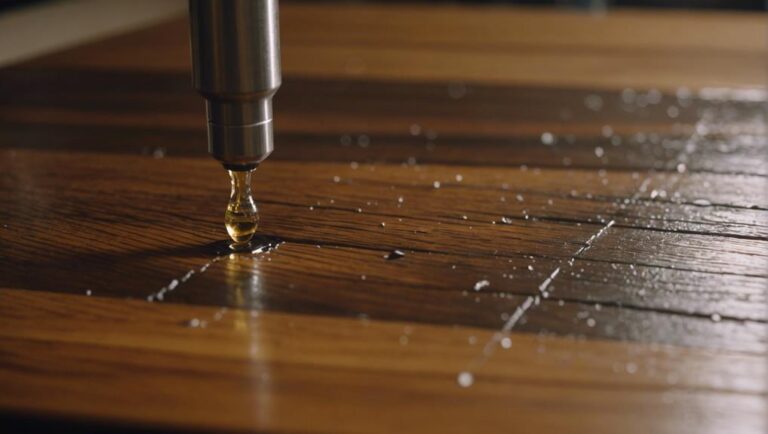
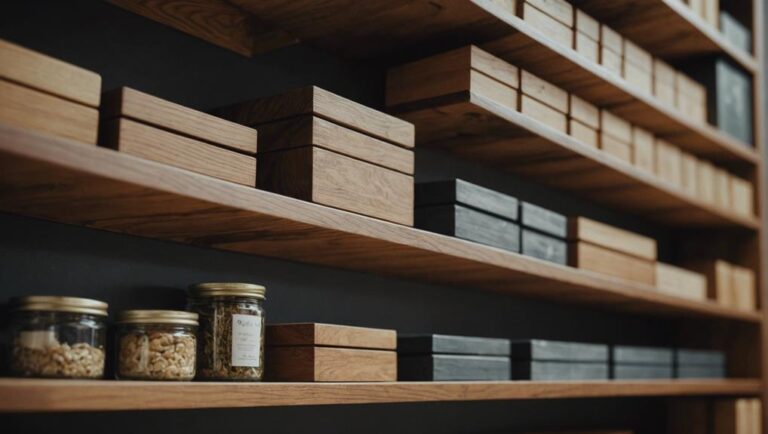
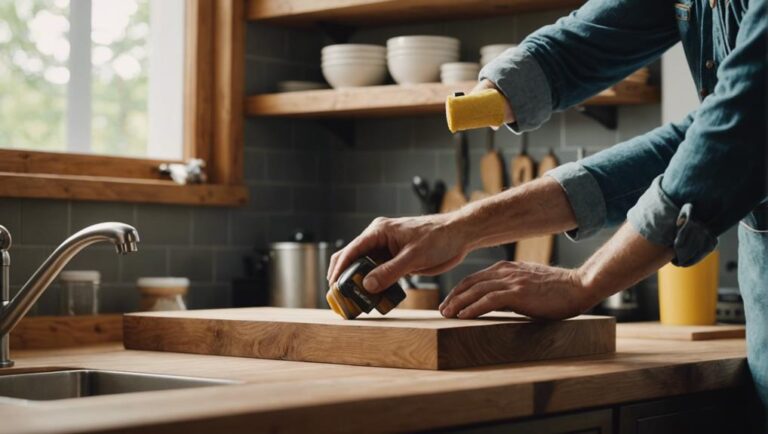
Applying Wood Sealants: Step-by-Step Guide for Floating Wood Shelves
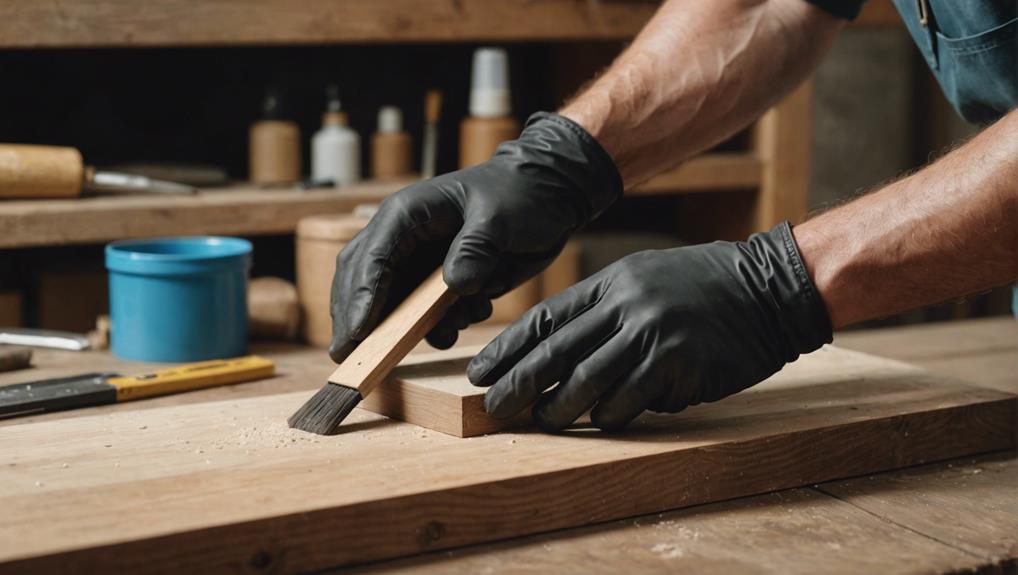
To apply wood sealant to your floating shelves, begin by selecting the appropriate sealant based on the type of wood and the desired finish.
It is essential to prepare the workspace by clearing any debris and ensuring proper ventilation. Thoroughly clean and dry the wood, then lightly sand the surface to improve adhesion.
Use a high-quality brush or roller to apply the sealant evenly, working in small sections to prevent drips and ensure complete coverage. Allow the sealant to dry completely before lightly sanding and applying additional coats as necessary. This will help achieve a flawless finish and enhance the durability of your shelves.
Inspect and tighten maintenance routines regularly to keep your floating wood shelves protected and looking beautiful.
By following these steps, you can effectively safeguard and enhance the aesthetic appeal of your shelves.
Key Takeaways
- Thoroughly clean and completely dry the wooden surface before applying the protective sealant to your floating wood shelves. This will ensure a smooth and even application.
- Utilize a top-notch brush or roller to evenly distribute the sealant on the wood. This will help provide a strong and durable protective layer against moisture and wear.
- Work on small sections at a time to maintain precision and control over the application process. This will result in a more professional and polished finish for your floating wood shelves.
- Allow sufficient time for the sealant to fully dry before applying additional coats. To enhance the smoothness of the surface, lightly sand the shelves with fine-grit sandpaper between each coat.
- To uphold the protection and visual appeal of your floating wood shelves, it is recommended to reapply the sealant every 1-2 years. This will ensure long-lasting durability and aesthetics for your shelves.
Importance of Wood Sealants
Wood sealants play a crucial role in safeguarding our floating wood shelves from moisture, stains, and potential damage. They act as a shield against environmental elements that could cause deterioration to the wood over time.
Applying a wood finish not only enhances the natural beauty of the wood by highlighting its grain and color but also provides a sturdy layer of protection.
By sealing our shelves, we ensure that they're easier to clean and maintain, catering to individuals who prioritize both aesthetics and functionality. In the absence of a suitable sealant, our shelves are at risk of warping, cracking, and losing their original luster, reducing their longevity and visual appeal.
This protective coating also prevents everyday spills and stains from penetrating the wood, making our upkeep tasks more effective.
Furthermore, a well-chosen wood finish doesn't just shield the wood; it enhances the overall appearance of our shelves, adding a sense of depth and richness to the wood's look. Investing in a high-quality sealant not only preserves the structural integrity of the shelf but also enhances its visual allure.
Ultimately, wood sealants are the unsung heroes in maintaining the elegance and durability of our floating wood shelves.
Choosing the Right Sealant
When choosing the right sealant for our floating wood shelves, we must consider the various options available, such as water-based, oil-based, and polyurethane sealants. Each type has its own advantages and disadvantages.
It's essential to ensure that the sealant we select is compatible with the specific type of wood used for our shelves to achieve optimal results. Additionally, we should factor in environmental conditions like UV resistance and levels of odor when making our decision to ensure it meets our requirements and preferences.
Types of Sealants
When choosing the best sealant for your floating wood shelves, it's important to consider options like polyurethane, varnish, and lacquer. Each type of sealant has its own unique advantages that can help protect and enhance your shelves.
Polyurethane is a popular choice for its exceptional durability and ability to resist moisture and scratches. This makes it a great option for shelves that are in high-traffic areas or exposed to the elements.
Varnish, on the other hand, provides a glossy finish that can highlight the natural beauty of the wood. It's perfect for those who want to showcase the grain and color of their shelves while still providing long-lasting protection.
Lacquer is known for its quick-drying properties and offers a hard, durable finish. This makes it an excellent choice for those looking for a fast project turnaround without sacrificing quality. The strong protection provided by lacquer ensures that your shelves can withstand daily wear and tear.
Consider your specific needs, such as the type of wood, how the shelves will be used, and the desired aesthetic, when selecting a sealant. This will help ensure that your floating wood shelves not only look great but also remain in top condition for years to come.
Sealant Compatibility Factors
Understanding the compatibility factors is crucial when selecting a sealant for your floating wood shelves. It's essential to consider the type of wood being used to ensure the sealant provides optimal protection and durability. Lighter woods such as pine or birch are best suited for water-based sealants, as they don't darken the wood and maintain its natural appearance. In contrast, hardwoods like oak or walnut benefit from oil-based sealants that penetrate deeply, offering robust protection.
Choosing a sealant specifically formulated for interior wood surfaces is important to safeguard the shelves from common indoor issues like moisture and scratches. Before applying the sealant, it's advisable to conduct a test on a small, inconspicuous area of the wood. This test allows for checking any undesirable color changes or compatibility issues that may arise.
When considering sealants for floating wood shelves, it's essential to match the sealant type with the type of wood being used. For lighter woods such as pine or birch, opt for a water-based sealant to maintain the natural appearance. Hardwoods like oak or walnut, on the other hand, benefit from oil-based sealants that provide deep penetration for strong protection.
Additionally, ensure that the sealant chosen is designed specifically for interior wood surfaces to protect against moisture and scratches. Always perform a test application on a small part of the wood to check for any potential color changes or compatibility issues before applying the sealant to the entire surface.
Environmental Considerations
Choosing an eco-friendly sealant for your floating wood shelves not only protects the wood but also minimizes environmental impact. Opting for water-based sealants helps reduce harmful chemical emissions, making them a sustainable choice. These sealants are designed to be less toxic, promoting a healthier indoor environment.
When it comes to air quality, selecting sealants with low VOC levels is crucial. Low VOC sealants contribute less to air pollution and pose fewer health risks, ensuring a safer living space.
Natural ingredients like linseed oil or beeswax can also be considered for a more sustainable option. These natural sealants not only perform well but also align with eco-friendly practices.
Certifications such as Green Seal or EcoLogo offer assurance that the sealants meet strict environmental standards. Choosing products with these certifications ensures that we're making a responsible choice for our floating wood shelves.
Avoiding sealants with high levels of toxic substances like formaldehyde or heavy metals is essential in reducing our environmental impact. By making informed decisions, we can contribute to a healthier planet while preserving the beauty and longevity of our shelves.
Preparing Your Workspace
Let's make sure our workspace is all set for applying the wood sealant to our floating wood shelves. We should clear away any debris or dust, gather all the necessary tools, and ensure proper ventilation by either working in a well-ventilated area or wearing a mask to protect ourselves from any fumes that may arise. Once everything is ready, we can confidently proceed with the sealing process.
Make sure the area is free of any clutter or dirt that could affect the application of the wood sealant. Having a clean workspace will help ensure a smooth and even finish on your floating wood shelves.
Gather all the tools you'll need, such as brushes, cloths, and the wood sealant itself, to have everything within reach during the sealing process.
Proper ventilation is crucial when working with wood sealants to protect your health from potentially harmful fumes. If you're not in a well-ventilated space, be sure to wear a mask to minimize your exposure.
Clear the Area
To ensure our workspace is ready for applying wood sealant to floating shelves, we must first prioritize cleanliness and organization. A tidy work area reduces the chances of debris contaminating the sealant, which could affect the final look of our shelves.
Begin by wiping down the shelves with a damp cloth to remove any dirt or residue. This step is crucial as even small particles left on the surface can interfere with the sealant's ability to adhere properly.
Ventilation is also key. Adequate airflow is necessary for the sealant to dry effectively and safely. It's important to wear protective gear, such as gloves and a mask, to shield yourself from any harmful fumes emitted by the sealant.
Lastly, always consider the weather conditions before starting. Humidity and temperature can impact the drying process and overall performance of the wood sealant.
Gather Necessary Tools
Now that our workspace is clean and well-ventilated, it's time to gather the essential tools for preparing our floating shelves for sealing. To protect our wooden shelves from moisture and wear, we'll need to get a high-quality wood sealant. This will help maintain the durability and visual appeal of our shelves over time.
Next, we should grab some sandpaper to smooth out any rough surfaces on the shelves. Opt for a fine-grit sandpaper, around 220-grit, to ensure the sealant adheres properly.
We'll also need clean cloths to wipe down the shelves after sanding, removing any dust or debris that could affect the sealant's application.
Don't forget to grab your safety goggles and gloves to protect your eyes and hands during the sealing process.
Lastly, make sure you have the manufacturer's instructions for the wood sealant on hand. Following these guidelines will help you achieve the perfect finish on your floating wood shelves.
Ensure Proper Ventilation
Ensuring our workspace has proper ventilation is crucial when applying wood sealants to our floating shelves. Good ventilation helps disperse harmful fumes and creates a healthier work environment. It's important to prioritize ventilation to prevent respiratory issues and discomfort while working with wood sealants.
For optimal ventilation:
- Open windows to let fresh air circulate and disperse sealant fumes.
- Use fans strategically to improve airflow and bring in fresh air while pushing out stale air.
- Choose a workspace with good natural air circulation whenever possible.
Avoid working in poorly ventilated, enclosed spaces that can trap harmful fumes, putting your health at risk. Consider wearing a mask or respirator to reduce inhalation of any potentially harmful chemicals in the wood sealants.
Cleaning the Shelves
Cleaning your floating wood shelves regularly using a soft cloth and a mild cleaner is crucial for maintaining their pristine condition and increasing their longevity. Using a wood-specific cleaner is essential to provide the proper care that your wooden shelves need, preserving their natural finish and enhancing their durability.
To enhance our cleaning approach, consider periodically rotating the items displayed on the shelves. This simple step helps prevent dust buildup and allows for a thorough inspection of the shelves for any signs of wear or damage. Promptly addressing any issues can significantly prolong the lifespan of your shelves.
It is important to be mindful of the environment surrounding your shelves. Keeping them away from moisture or sources of heat is vital to prevent any damage to the wood sealant. This precaution is essential for maintaining both the aesthetic appeal and structural integrity of the wood used for your shelves.
Sanding the Wood Surface
Sanding the wood surface plays a crucial role in ensuring a smooth and flawless finish on our exquisite floating wood shelves. This process not only enhances the visual appeal but also prepares the wood for optimal adhesion of protective coatings. To master this task, we need to follow a few key steps.
Begin by using sandpaper with varying grit levels, starting with a coarse grit to address any rough spots or imperfections. Gradually transition to finer grits to achieve a refined and polished surface. It's important to start with a coarse grit and progress to a finer grit to ensure a seamless and professional result.
Always remember to sand in the direction of the wood grain to avoid scratches and maintain a high-quality finish. Take your time and be patient while sanding, as thoroughness is key to creating a perfect base for the protective coatings.
As we carefully sand the wood surface, each stroke of the sandpaper should be deliberate and precise, enhancing the natural beauty of the wood. This step goes beyond mere preparation; it establishes the groundwork for a stunning final product. Proper sanding not only enhances the aesthetic appeal of our floating wood shelves but also ensures their longevity and durability, reflecting our commitment to craftsmanship and quality.
Removing Dust Particles
To maintain the pristine condition of our floating wood shelves, it's essential to use the right tools and techniques for removing dust particles. A soft cloth or microfiber duster works effectively for regular dusting, preventing buildup and preserving the wood's appearance.
For a deeper clean, it's recommended to choose a gentle wood-specific cleaner or a mild soap and water solution. After cleaning, always finish with a clean, dry cloth to ensure no residue is left behind.
In addition to regular dusting, applying a wood sealant or protective coating can help enhance the longevity and durability of floating wood shelves. These specialized products provide a barrier against dust, moisture, and other environmental factors that can damage the wood over time. By sealing the wood properly, we can maintain its natural beauty and protect it from wear and tear.
When selecting a wood sealant or protective coating for floating wood shelves, it's important to consider the type of wood used and the desired level of protection. Some sealants offer a glossy finish, while others provide a more matte or natural look. By choosing the right product for our specific needs, we can ensure that our shelves remain in top condition for years to come.
Proper Dust Removal Techniques
To keep our floating wood shelves in top condition for sealing, we need to ensure they're free of any dust particles. Having a clean surface is crucial for the sealant to adhere properly.
Here's how we can achieve this:
Using a microfiber cloth or a soft brush is the best way to gently remove dust from the shelves. These tools are effective in capturing even the tiniest specks without causing any harm to the wood finish. It's important to steer clear of harsh chemicals or abrasive materials, as they can damage the integrity and appearance of the wood.
Regular dust removal not only preps the surface for sealing but also helps maintain the longevity and aesthetic appeal of the shelves. This step is essential before applying any wood sealants to ensure a clean surface that the sealant can adhere to.
Consider using a vacuum with a soft brush attachment to efficiently and thoroughly remove dust. This method can access crevices and corners that cloths might miss, ensuring a comprehensive cleaning process.
- Microfiber cloth: Great for capturing fine dust particles without scratching.
- Soft brush: Gently sweeps away dust and debris.
- Vacuum with brush attachment: Ensures thorough cleaning, especially in hard-to-reach areas.
Effective Cleaning Tools
To effectively maintain the cleanliness of floating wood shelves, it's essential to utilize specialized cleaning tools tailored for gentle yet thorough dust removal. A soft cloth or microfiber duster is crucial for eliminating surface dust without causing any damage to the wood finish. These tools aren't only necessary but also highly efficient in capturing and removing dust particles effectively.
For a more innovative cleaning approach, incorporating a vacuum cleaner with a soft brush attachment can significantly enhance the cleaning process. This method proves to be highly effective in reaching and eliminating dust from intricate corners and crevices that may otherwise be challenging to access. By utilizing this tool, we can ensure the pristine appearance of our wood shelves is maintained effortlessly.
In instances where stubborn dust or grime persists, employing a slightly damp cloth or sponge with a mild cleaner can work wonders. It's important to ensure that the cloth is only minimally damp to prevent any potential damage to the wood surface.
Regular dusting using these specialized cleaning tools is paramount in preventing dust buildup and preserving the aesthetic appeal of our floating wood shelves.
Applying the First Coat
Let's ensure the wood surface is clean and dry before applying the wood sealant to ensure proper adhesion. This step is crucial for achieving a smooth and durable finish.
Armed with a high-quality brush or roller, we can start the process of applying the first coat of wood sealant. The main aim here is to achieve even coverage, so our focus should be on our technique.
When using a brush or roller, remember not to overload it with sealant to prevent drips and ensure even application. Work in small sections to maintain control and precision. Before moving on to the next section, check for any missed spots to ensure thorough coverage.
Evenly applying the sealant not only enhances the wood's natural beauty but also provides essential protection. It's important to follow the manufacturer's instructions regarding drying times, as a complete drying period is typically required before applying additional coats. This allows the wood sealant to fully penetrate and cure, resulting in the best possible finish.
After the first coat has dried, inspect the surface for any missed spots or uneven coverage. This attention to detail will guarantee that your floating wood shelves remain both functional and visually appealing.
Following the Wood Grain
Following the natural wood grain when applying the sealant is essential for enhancing the beauty and durability of floating wood shelves. By aligning our brush strokes with the grain, we not only improve the aesthetics but also ensure that the sealant penetrates effectively, offering superior protection against moisture and wear. This careful approach helps to prevent streaks, bubbles, and brush marks, resulting in a professional and refined finish that showcases the quality of our work.
When the sealant is applied against the wood grain, it can lead to uneven coverage and potential damage. Ignoring the direction of the grain may create a surface that's more prone to wear and tear, ultimately compromising the longevity of the wood. By working in harmony with the grain, the sealant can seep into the natural grooves, strengthening the wood from within and highlighting its unique texture.
Respecting the natural lines of the wood isn't just about maintenance; it's an innovative approach to craftsmanship. By honoring the wood's inherent beauty, we elevate the final product, turning a simple task into a form of art. This attention to detail ensures that our floating wood shelves aren't only durable but also visually striking, ready to withstand the test of time.
Letting the Sealant Dry
Ensuring the sealant dries completely is crucial for achieving a flawless finish on our floating wood shelves. This step is essential to prevent smudges or imperfections that could ruin our hard work. The drying time of the sealant may vary depending on the type we use, with some sealants requiring up to 24 hours or more to fully cure. It's important to be patient during this process and refrain from touching or moving the shelves.
Proper ventilation in the drying area is also important. Good airflow not only speeds up the drying process but also helps to disperse any strong fumes. Following the manufacturer's instructions for specific drying times and additional recommendations is always recommended.
Factors such as temperature and humidity can have a significant impact on drying times. Thicker layers of sealant will take longer to dry, so it's essential to apply it evenly. Additionally, ensuring the surface is properly prepared will help the sealant to be absorbed more uniformly.
Sanding Between Coats
After the sealant has fully dried, it's crucial to sand between coats to achieve a smooth and even finish on our floating wood shelves. Using fine-grit sandpaper, we lightly sand the surface to remove any imperfections or raised wood fibers. This step is essential for a professional appearance, as it eliminates inconsistencies that could affect the final look of our shelves.
Sanding between coats not only enhances the aesthetics but also improves the adhesion of subsequent layers. By creating a slightly roughened surface, we help the next coat of sealant bond more effectively, resulting in a more durable finish. This improved adhesion ensures that our floating wood shelves can withstand daily use while maintaining their polished appearance.
Proper sanding is key to achieving a flawless finish. It's important to be thorough yet gentle, avoiding excessive pressure that could harm the wood. Instead, focus on a consistent, even sanding motion to refine the surface for the next coat of sealant. By following this process diligently, we can ensure that our floating wood shelves will have a sleek, professional look that lasts.
Sanding between coats plays a significant role in the overall quality and longevity of our floating wood shelves. It not only smoothens the surface but also enhances the bond between layers of sealant, resulting in a more resilient finish. This meticulous approach to sanding ensures that our shelves maintain their beauty and durability over time, making them a lasting and impressive addition to any space.
Applying Additional Coats
Adding more layers of wood sealant significantly improves the durability and protection of our floating wood shelves. Each additional coat helps to create a thicker barrier, enhancing resistance to moisture, stains, and scratches. To get the best results, it's crucial to ensure that each coat is completely dry before applying the next one. This step is essential for proper adhesion and to maximize the effectiveness of the wood sealants.
For a smoother and more effective process, consider the following tips:
- Allow Sufficient Dry Time: Ensure each coat is fully dry to prevent any adhesion issues.
- Lightly Sand Between Coats: Lightly sanding between coats helps to remove imperfections and promote better adhesion.
- Follow Manufacturer's Instructions: It's important to adhere to the recommended number of coats specified for the type of wood sealant being used.
Final Drying Time
Let's delve into the final drying phase, a critical step in sealing floating wood shelves. Understanding the optimal drying conditions is key to ensuring a top-notch finish. Avoiding common mistakes and implementing time-saving strategies can streamline the process and result in a durable, professional outcome.
To achieve the best results during the final drying phase, it's crucial to create an environment with ideal humidity levels and temperature. This will promote proper curing of the sealant or protective coating, leading to a strong and long-lasting finish on your wood shelves. Keep in mind that factors like air circulation and ventilation can also impact drying time and the overall quality of the sealant application.
One common mistake to avoid during the final drying process is rushing the timeline. While it may be tempting to expedite the drying time, doing so can compromise the integrity of the sealant or coating. Patience is key here, as allowing sufficient time for the product to cure will ultimately result in a more durable and professional finish on your floating wood shelves.
In order to make the final drying phase more efficient, consider using drying aids such as fans or dehumidifiers to help speed up the process. These tools can help create the optimal drying conditions and reduce the overall time it takes for the sealant or coating to fully cure.
Optimal Drying Conditions
For optimal results, it's crucial to ensure that wood sealants on floating shelves dry for 24 to 48 hours under the right conditions. This timeframe allows the sealant to cure effectively, providing long-lasting protection and a flawless finish. However, achieving the ideal drying conditions is essential for success.
Temperature is a key factor in the drying process. Moderate and consistent temperatures are best, with room temperature, around 70°F (21°C), being the ideal range. Extreme temperatures can hinder the curing process and result in subpar outcomes.
Humidity levels also play a significant role in the drying process. High humidity can slow down drying, while low humidity can accelerate it too quickly, potentially affecting the cure. Aim for a balanced humidity level of around 50% to promote optimal drying.
Ventilation is essential for proper drying. Adequate airflow ensures even drying and prevents moisture from becoming trapped. To optimize drying conditions, maintain consistent airflow using fans or open windows, avoid direct sunlight to prevent uneven drying, and monitor temperature and humidity levels with a hygrometer and thermometer to keep conditions stable.
Common Drying Mistakes
Proper drying conditions are crucial when applying sealants to our floating wood shelves. However, several common mistakes can occur during the final drying process, potentially compromising the effectiveness of the sealant. Hastening the process, for example, can result in a sticky or tacky finish, impacting both the aesthetic appeal and longevity of our shelves. Allowing adequate drying time is essential for the sealant to cure correctly.
Insufficient ventilation is another frequent error that can impede drying and lead to an uneven finish. Adhering to the manufacturer's guidelines regarding drying times and environmental conditions is imperative. Temperature and humidity levels also have a significant impact; high humidity can prolong drying, while low temperatures can hinder the curing process.
To prevent these issues, refer to the following table for quick reference:
| Mistake | Consequence |
|---|---|
| Rushing drying | Tacky, sticky finish |
| Poor ventilation | Uneven drying |
| Ignoring humidity | Extended drying time |
| Low temperatures | Hindered curing process |
Time-Saving Tips
To expedite the sealing process for floating wood shelves, consider using a quick-drying wood sealant. Waiting for each coat to dry completely is crucial for a durable finish, but choosing a fast-drying option can significantly reduce application time. This allows for a quicker progression in completing your project.
To enhance efficiency and ensure optimal results, remember these key pointers:
- Ventilation: Opt for a well-ventilated area to accelerate the drying process.
- Manufacturer's Instructions: Always adhere to the recommended drying times provided by the manufacturer.
- Layering: Allow each coat to fully dry before adding the next layer to maintain a strong and long-lasting seal.
While some wood sealants may necessitate up to 24 hours to fully dry, modern fast-drying products can expedite this timeline. By following these guidelines and selecting the appropriate sealant, you can save time without compromising quality.
Prioritize efficiency and accuracy in your sealing process to achieve stunning and resilient floating wood shelves.
Inspecting the Finish
Let's carefully examine the finish for any signs of scratches, dents, or uneven staining. Ensuring our floating wood shelves look flawless is crucial to maintaining their modern appeal. First, let's closely inspect the wood surface for any imperfections that could detract from the overall aesthetic.
Next, check the color and sheen of the finish to ensure it matches your desired look. If the staining appears uneven, consider adding more coats for a consistent finish. Look out for any areas that may need touch-ups to ensure complete coverage. Remember, untreated spots could compromise the shelf's durability in the long run.
Before applying any sealant, make sure the wood is clean and dry. Trapping dirt or moisture under the sealant can lead to damage and may require refinishing the entire surface. Focus on high-traffic areas that need extra protection to withstand daily use.
Maintaining Sealed Shelves
To maintain the quality of your sealed wood shelves, it's essential to clean them regularly with a soft cloth and a cleaner specifically designed for wood surfaces. This gentle cleaning routine helps eliminate dust and dirt build-up, preserving both the appearance and structural strength of the shelves. Harsh chemicals and abrasive cleaners should be avoided as they can harm the sealant, compromising its protective properties.
Regular inspections of your shelves are also important to catch any signs of wear and tear early on. This proactive approach ensures that the sealant remains effective in safeguarding the wood. Rotating the items displayed on the shelves can help prevent uneven exposure to light, which can cause fading and wear on the finish.
In addition to these measures, it's crucial to protect your sealed wood shelves from direct sunlight and moisture. Prolonged exposure to these elements can lead to fading and warping over time, diminishing the shelf's appearance and durability. By following these maintenance practices, you can prolong the lifespan of your shelves and keep them in excellent condition.
Utilize cleaners specifically formulated for wood to maintain the sealant.
Regularly inspect shelves for wear and tear to address issues promptly.
Rotate displayed items to ensure even exposure and preserve the finish.
Protect shelves from direct sunlight and moisture to prevent fading and warping.
Reapplying Sealant
Reapplying sealant is crucial for maintaining the integrity and appearance of your floating wood shelves. It's recommended to perform this maintenance task every 1-2 years to ensure the wood remains protected from moisture damage, preserving its beauty and durability.
Before starting the reapplication process, it's essential to thoroughly clean the shelves. Dust, dirt, and grime can affect the adhesion of the sealant, diminishing its effectiveness. We suggest using a mild cleanser and a soft cloth to wipe down the shelves, making sure they're completely dry before moving forward.
When reapplying sealant, it's important to choose a high-quality wood sealant. This not only prolongs the lifespan of your shelves but also offers maximum protection against environmental elements. Follow the manufacturer's instructions closely, particularly regarding application techniques and drying times. This will ensure that the sealant penetrates the wood effectively, creating a strong barrier against moisture.
Frequently Asked Questions
How Do You Finish Wood Floating Shelves?
When selecting wood for your floating shelves, it's important to choose a high-quality, durable option such as oak, maple, or cherry. These hardwoods not only provide a strong base for your shelves but also offer a beautiful aesthetic to complement any room.
To prepare the wood for finishing, using a pre-stain conditioner is crucial. This helps the wood absorb the stain evenly and prevents blotchiness. Once the conditioner has dried, applying a gel stain can give your shelves a rich, deep color that enhances the natural beauty of the wood.
After staining, filling any holes or imperfections with a product like Minwax Wood Filler ensures a smooth surface for your shelves. Sanding the shelves between coats of finish is essential for a flawless final result.
To protect and seal the wood, applying a glossy varnish or polyurethane finish is recommended. These protective coatings not only enhance the appearance of the wood but also provide durability and resistance to scratches and moisture.
How to Seal a Wood Shelf?
When it comes to sealing your floating wood shelves, choosing the right sealant is crucial for long-lasting protection. Opt for a water-based polyurethane sealant for its durability and resistance to moisture. This type of sealant forms a hard protective layer on the wood surface, keeping it safe from scratches and stains.
To ensure a smooth and sleek finish on your wood shelves, sand the surface between each coat of sealant. This will help remove any imperfections and create a uniform appearance. Make sure to allow each coat to dry completely before applying the next one to prevent bubbling or uneven coverage.
How Do You Affix Floating Shelves?
We install floating shelves by fixing mounting hardware onto the wall, ensuring precise alignment with a level. Using appropriate screws or bolts, we securely attach the shelves, considering weight capacity and load distribution for a sturdy and reliable installation.
When it comes to floating wood shelves, selecting the right wood sealants and protective coatings is crucial for enhancing their durability and longevity. Sealants help prevent moisture damage and stains, while coatings provide an extra layer of protection against scratches and wear.
Applying a quality sealant like polyurethane or lacquer can safeguard the wood from humidity and spills, maintaining its natural beauty and integrity over time. Additionally, opting for protective coatings with UV inhibitors can help prevent discoloration and sun damage, especially for shelves exposed to natural light.
How Do You Make Floating Shelves Step by Step?
We start by measuring and cutting the plywood to precise dimensions. Next, we assemble the frame and securely attach it to the wall. Then, we carefully apply a wood sealant to protect the shelf from moisture and wear. Once the sealant has dried, we add a protective coating for a sleek and durable finish.
To achieve a modern and innovative look, we recommend using a clear gloss finish that enhances the natural beauty of the wood. This type of coating provides a glossy sheen that reflects light, giving your floating shelf a sophisticated touch.
How Do You Mark a Floating Shelf?
When marking a floating shelf, we measure the precise positioning and mark it with a pencil or chalk. It's important to ensure the measurements are accurate, guaranteeing that the shelves are level and perfectly aligned for a modern and polished appearance.
To enhance the longevity and durability of floating wood shelves, it is recommended to apply wood sealants and protective coatings. These treatments help protect the wood from moisture, stains, and scratches, extending the lifespan of the shelves and maintaining their pristine condition.
Wood sealants create a protective barrier that prevents water and other liquids from penetrating the wood, reducing the risk of warping or damage. Additionally, protective coatings add an extra layer of defense against everyday wear and tear, keeping the shelves looking new and well-maintained.
Conclusion
Following our step-by-step guide ensures our floating wood shelves aren't only visually appealing but also long-lasting. From selecting the appropriate sealant to thorough sanding, each step plays a crucial role in the final outcome.
Proper preparation and precise application are vital in shielding the wood from harm and prolonging its lifespan. Regular maintenance and reapplication of the sealant will help in preserving the shelves' pristine appearance.
Let's stay dedicated to these practices to ensure that our woodworking projects stand the test of time as a testament to our skill.

