
Finishing Touch: Final Sanding for a Professional Look
To achieve a professional finish on floating wood shelves, meticulous final sanding is essential. Begin by thoroughly cleaning the surface to remove any dirt, grease, or previous finishes.
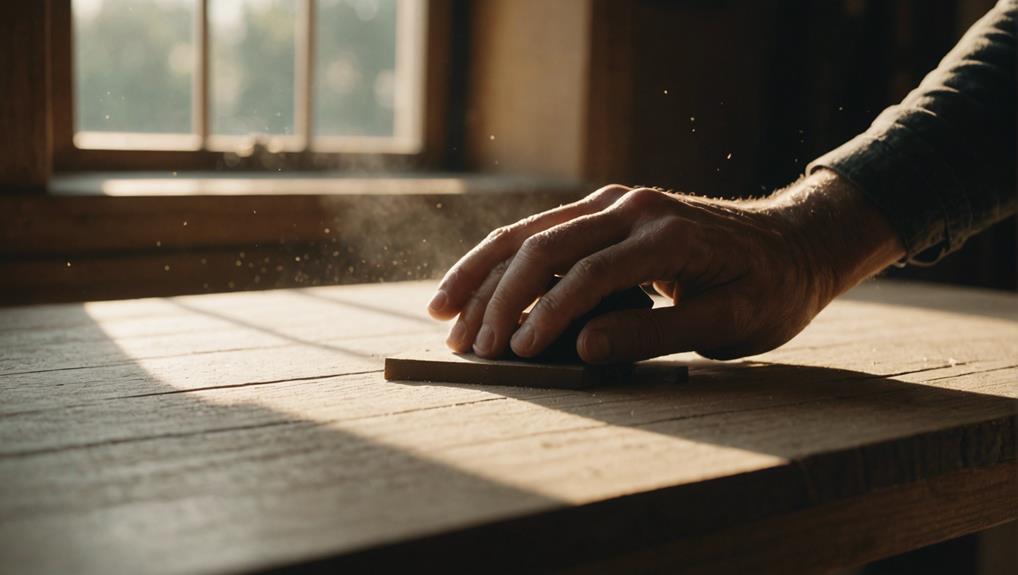
Utilize precise tools like Festool HSK sanding blocks and Mirka HandyKits to progressively sand with finer grits, always following the direction of the wood grain. By addressing minor imperfections early on, you can ensure a flawless surface.
Prioritize safety by maintaining proper ventilation and wearing protective gear, such as dust masks, to safeguard your health. For a polished and professional appearance, complete the process by meticulously removing all dust and debris.
Mastering these steps will elevate the quality of your woodworking projects.
Key Takeaways
- Use finer grit sandpaper gradually to achieve a smooth and polished surface on your floating wood shelf.
- Always sand in the direction of the wood grain to avoid creating scratches that can detract from the final look.
- Employ a sanding block to ensure even pressure and consistent results throughout the process.
- Finish off the sanding process with very fine grit sandpaper to achieve a professional and sleek finish on your shelf.
- Before applying any finish, make sure to thoroughly clean the surface of the shelf to remove all dust and debris for a flawless end result.
Tools for Final Sanding
Let's dive into the essential tools for final sanding to achieve a professional finish on your floating wood shelves.
Sanding blocks, such as the Festool HSK, provide a comfortable grip and allow for quick changes in grit, enabling a seamless transition between sanding stages. These blocks are essential for creating smooth surfaces efficiently.
When it comes to durability, Dura-GRIT TruSanders are equipped with tungsten carbide granules, ensuring long-lasting performance for your final sanding tasks. These blocks are designed to withstand heavy use, making them a reliable choice for projects that require extended use.
For detailed work, the Veritas Shooting Sander is a valuable tool with its adjustable knob that allows for precision sanding. This feature enables you to fine-tune your approach for a flawless finish, especially in tight spots or when aiming for an exceptionally smooth surface.
Maintaining a clean workspace is crucial, and the Mirka HandyKit is perfect for dust-free sanding. With its vacuum hose attachment and compatible sanding sheets, you can keep your environment tidy while achieving excellent results on your floating wood shelves.
Lastly, the Vario-Pro Sander excels in handling convex or concave profiles, ensuring that every surface, regardless of its shape, receives meticulous attention. By utilizing these tools, you can elevate your final sanding process to a professional level and achieve outstanding results on your floating wood shelves.
Preparing the Surface
For a polished look, it's crucial to start by thoroughly cleaning the surface of your floating wood shelf. Removing any dirt, grease, or existing finishes is key to achieving a flawless result. Using a damp cloth or tack cloth, you can effectively get rid of debris that might obstruct the sanding process. A pristine surface is essential for creating a professional finish.
If your wood shelf has old finishes, consider stripping or scraping them off to eliminate any imperfections. This step sets the stage for a smooth final sanding process. Addressing these imperfections early on is vital as they can significantly impact the overall outcome.
Once the surface is clean and free of any contaminants, you can proceed confidently. Surface preparation isn't just about cleanliness; it's about laying the groundwork for a perfect finish. By investing time in this step, you enhance the quality of your sanding, ensuring a professional end result.
Sanding Techniques
Sanding down a floating wood shelf to a smooth, professional finish requires a strategic approach. Start by using increasingly finer grits of sandpaper, progressing from coarse to fine. Each sanding stage should aim to eliminate the scratches left by the previous one, ensuring a flawless end result.
To maintain the natural beauty of the wood and prevent unwanted scratches, always sand in the direction of the wood grain. Going against the grain can mar the surface, detracting from the overall appearance. For flat surfaces, utilizing a sanding block helps distribute pressure evenly, resulting in a uniform finish. Hand sanding, although more time-consuming, allows for a tactile approach, ensuring thorough coverage and a consistent smoothness.
Regularly assessing your progress and concluding with a very fine grit sandpaper can significantly enhance the wood shelf's look. Slow and deliberate sanding techniques are key to achieving the desired outcome, avoiding any hasty errors. By adhering to these sanding methods, your floating wood shelf will boast a refined, professional appearance that's sure to impress.
Addressing Imperfections
Now, let's focus on addressing imperfections by first pinpointing surface flaws like bumps, ridges, and uneven areas on the floating wood shelf.
To rectify these issues, we'll carefully utilize fine-grit sandpaper to ensure a smooth and flawless surface.
This level of meticulous attention to detail is crucial in achieving the desired professional finish for the floating wood shelf.
Identifying Surface Flaws
Finding flaws on the surface of your floating wood shelf is crucial for achieving a polished, professional look. Scratches, dents, and uneven surfaces can detract from the overall appearance, so it's essential to spot and address them early on.
By examining the surface under different lighting conditions and using tools like a magnifying glass or touch-sensitive inspection, you can catch even the smallest imperfections that might go unnoticed.
Being diligent in your inspection process ensures that every scratch and dent is taken care of, leading to a flawless final finish that elevates your project to masterpiece status. Don't overlook uneven surfaces either, as they can disrupt the smoothness you're striving for. Identifying these issues at the outset allows for seamless corrections to be made.
Utilizing top-notch lighting and tactile feedback tools is key to effectively detecting and fixing surface flaws. Dedication to this meticulous approach guarantees that your end product exudes professionalism and excellence.
Corrective Sanding Techniques
Once surface flaws are identified on floating wood shelves, the focus shifts to corrective sanding techniques to achieve a smooth, professional finish. Utilizing a sanding block with a finer grit sandpaper is essential to address imperfections effectively. It's crucial to maintain a light touch and consistent pressure to ensure uniformity and smoothness across the surface.
When tackling ridges on the wood shelves, sanding with a finer grit sandpaper is key to smoothing out these imperfections. For bumps, a gentle approach using the sanding block can help level out the surface. Carefully blending edges on uneven surfaces is necessary to eliminate visible defects and prepare the wood for finishing coats.
Precision and attention to detail play a vital role in this stage of corrective sanding. By meticulously blending edges and smoothing out imperfections, the wood shelves are transformed into flawless surfaces ready for the finishing touches. This meticulous approach not only enhances the aesthetic appeal but also ensures a high-quality, professional result.
Corrective sanding is a transformative process that turns rough patches on floating wood shelves into smooth, professional-grade surfaces. By dedicating time and effort to refine each area, the final product showcases a level of craftsmanship and excellence. Through these techniques, the wood shelves stand out with a superior finish, reflecting a commitment to quality and innovation in every project.
Safety Precautions
When sanding floating wood shelves, safety precautions are essential. Wearing proper protective gear, such as dust masks or respirators, is crucial to protect your lungs from harmful fine dust particles.
Good ventilation and effective dust control methods can further reduce the risks associated with wood dust exposure.
It's vital to prioritize your safety while working on your floating wood shelves.
Proper Protective Gear
When sanding floating wood shelves, it's crucial to prioritize your safety by wearing a dust mask or respirator. Sanding creates fine dust particles that can be harmful to your lungs, especially when using different grits of sandpaper. Inhaling this dust can lead to serious health issues over time. By using the appropriate protective gear like a dust mask or respirator, you can significantly reduce your exposure to these dangerous particles.
It's essential to recognize that wearing the right protective gear isn't just a choice—it is a necessary part of your sanding routine. A high-quality respirator or dust mask specifically designed for fine dust can greatly lower the risk of respiratory problems, ensuring your long-term well-being.
Investing in proper protective gear may seem like a small step, but it's a significant move towards creating a safer and healthier work environment.
As you work towards achieving a flawless finish on your floating wood shelves, remember that your health is a top priority. By consistently wearing a dust mask or respirator, you can focus on the task at hand with confidence, knowing that your health is being safeguarded.
Ventilation and Dust Control
Proper ventilation and effective dust control are crucial when sanding floating wood shelves. Inhaling dust particles during this process can pose serious health risks, particularly to our respiratory system.
To ensure a safe and clean work environment, it's essential to follow key steps:
Firstly, robust ventilation systems should be installed to maintain consistent airflow. This helps reduce dust buildup and keeps the workspace cleaner.
Additionally, wearing a high-quality respirator is indispensable to protect against fine dust particles that may not be captured by ventilation systems.
Utilizing dust extraction tools, such as vacuum attachments, is also important. These tools can efficiently capture and remove sanding dust at the source, improving overall safety and cleanliness.
Regular cleaning and maintenance of dust collection equipment is crucial for optimal performance in managing and controlling dust levels.
Cleaning Up
Ensuring a pristine work area and materials is crucial for achieving a flawless final finish when working on floating wood shelves.
Surface preparation plays a vital role in achieving a professional look. Before applying the final finish, it's essential to ensure a smooth surface by eliminating all dust and debris. Even the smallest particles can compromise the quality of our project, so thorough dust removal is imperative. Quality paper towels can be used to wipe down surfaces, guaranteeing they're free of any contaminants.
To effectively remove dust, tools such as an air hose or oil-free tack cloths can be utilized. Oil-free tack cloths are particularly suitable for water-based finishes, as they don't introduce any unwanted substances like linseed oil.
Equally important is cleaning the work area meticulously. A clean workspace prevents any stray particles from resettling on the freshly prepared surfaces, maintaining the integrity of the project.
Once dust removal is complete, we can confidently proceed with the final finish, knowing that our meticulous cleaning has laid the foundation for a successful outcome.
Frequently Asked Questions
What Is the Golden Rule of Sanding?
When finishing floating wood shelves, it is important to adhere to the golden rule of sanding: always sand in the direction of the wood grain. This simple technique ensures a smooth and uniform finish, while also maintaining the integrity of the wood surface and minimizing the risk of scratches. By following this principle, you can achieve a professional-looking result that enhances the overall aesthetic of your shelves.
Proper pressure application during sanding is crucial in achieving the desired smoothness and consistency. By applying even pressure and using the right sandpaper grit, you can effectively remove any imperfections or rough spots on the wood surface. Additionally, ensuring sanding safety by wearing protective gear such as goggles and a dust mask is essential to prevent any potential injuries or health hazards.
What Grit Sandpaper for Final Sanding?
For achieving a smooth finish on floating wood shelves, it is recommended to use 3000 grit sandpaper for the final sanding process. This fine grit sandpaper helps enhance the surface smoothness of the wood, preparing it for the application of a clear coat or paint. Using finer sandpaper types can result in a flawless final polish, ensuring a professional and refined look for your floating wood shelves. This sanding technique is crucial in creating a sleek and polished appearance for your shelves, making them ready for display in your home or office.
What Is the Proper Sanding Process for Finishing a Project?
Proper sanding techniques are crucial when finishing a floating wood shelf project. To achieve a flawless surface, it is essential to select the appropriate sanding tools and follow the correct sanding direction. By avoiding common sanding mistakes and prioritizing safety measures, you can ensure a high-quality result. Remember to invest ample time in each step of the sanding process to achieve a smooth and professional finish.
Sanding plays a vital role in preparing the wood surface for finishing. By using the right tools, such as sandpaper or a power sander, you can effectively smooth out any imperfections and create a uniform surface. It is important to sand in the direction of the wood grain to prevent any damage or scratches that may affect the final appearance of the shelf.
In addition to selecting the proper tools and following the correct sanding direction, it is essential to pay attention to detail during the sanding process. Take the time to inspect the wood surface for any remaining rough spots or uneven areas, and continue sanding until you achieve a consistent smoothness. This attention to detail will result in a polished and professional-looking floating wood shelf.
Prioritizing safety during the sanding process is also crucial. Wear protective gear, such as goggles and a dust mask, to shield yourself from potential hazards like flying wood particles and dust. Proper ventilation in the workspace is also important to ensure a safe and healthy environment while sanding.
What Grit Sandpaper for Final Drywall Sanding?
For achieving a smooth finish on floating wood shelves, it is recommended to use 220 grit sandpaper. Opting for reputable sandpaper brands, along with innovative sanding tools and sanding blocks, can help in achieving a flawless surface. Effective dust control measures and mastering the art of sanding are crucial in creating a perfect finish on wood shelves.
When it comes to floating wood shelf finishing, choosing the right sandpaper grit can make all the difference. By using 220 grit sandpaper, you can ensure that the surface is smooth and ready for staining or painting. Pairing this with high-quality sanding tools and techniques can help in achieving a professional-looking result.
To achieve a polished look on floating wood shelves, it is essential to pay attention to detail in the sanding process. Proper dust control not only ensures a cleaner work environment but also helps in achieving a smooth and even finish. By utilizing the right sandpaper grit and techniques, you can enhance the overall appearance of your wood shelves and make them stand out in any room.
Conclusion
In the realm of floating wood shelf finishing, attention to detail is key. Surprisingly, a significant number of DIY projects involving floating wood shelves fall short of professional standards due to inadequate sanding techniques.
By selecting the appropriate tools, meticulously preparing the surface, and implementing effective sanding methods, we can elevate the overall quality of our shelves.
It's crucial to prioritize safety measures and ensure thorough cleanup after each sanding session. By committing to precision and dedication, we can guarantee that our floating wood shelves meet the highest standards of craftsmanship.